Import from Keeper
Quickly transfer data from Keeper Password Manager to Bitwarden using one of two methods:
Using a Bitwarden browser extension or desktop app, import data directly without needing to download a file.
Using any Bitwarden app, download an export from your Keeper account and import it into Bitwarden.
To import Keeper data directly to Bitwarden, without needing to download an export file and transfer data manually:
In the Bitwarden desktop app or browser extension, open the Import page:
On desktop apps, select Import from the navigation.
On browser extensions, navigate to Settings > Vault options > Import.
Choose the Vault you want to import to and, optionally, a Folder or Collection to add imported data to.
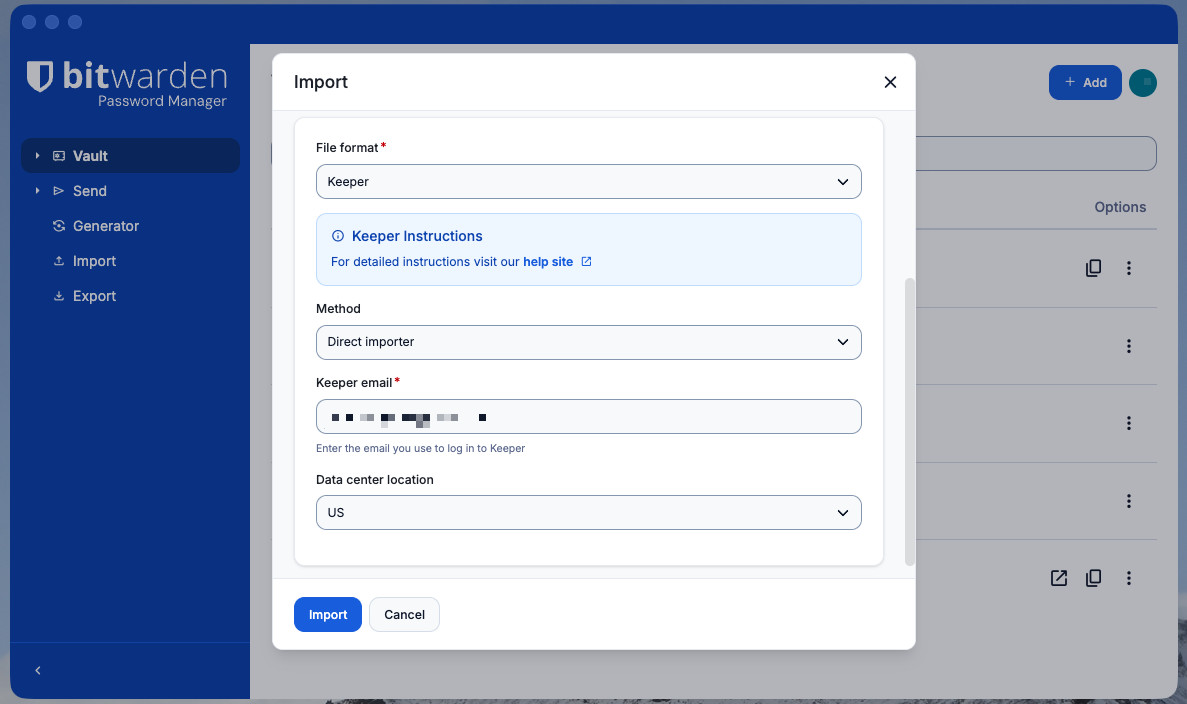
Import directly from Keeper From the File format dropdown, select Keeper.
From the Method dropdown, select Direct importer.
Enter your Keeper email and Data center location.
tipYour Data center location correlates to the region you select when you log in to Keeper. It can also be found in the URL of your Keeper vault when logged in on the web (for example,
keepersecurity.comis US,keepersecurity.euis EU, and so on).Select Import and, when prompted, complete your required authentication steps for Keeper. This requires your Master Password or SSO and some form of Device Approval. Here are two examples of what this will look like:
As a personal user of Keeper, you would typically:
Select a Device approval method to use. For personal users this can be:
An Email sent to the inbox attached to your Keeper account.
A Keeper Push notification that you can approve from the Keeper web app.
A Two-factor method you're using for your Keeper account.
noteBitwarden currently supports the Keeper Text Message, Authenticator App, and Keeper DNA options for two-factor authentication.
Enter your Keeper Master Password.

To export data from the Keeper web app:
Select your account email in the top corner of the web app and select Settings from the dropdown:
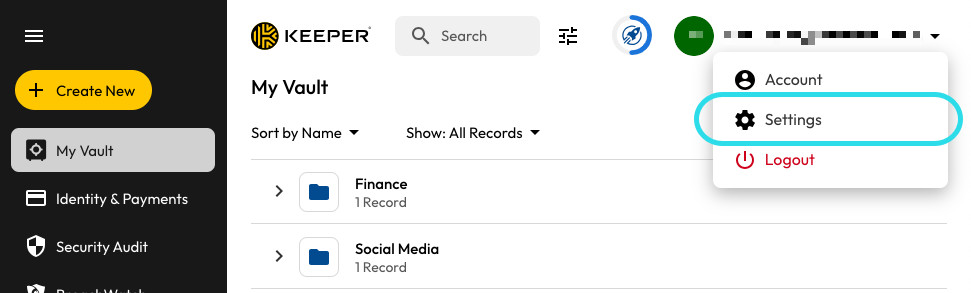
Export from Keeper Select Export from the pop-up window.
Choose the CSV or JSON export file type.
Select Export.
Enter your Keeper Master Password.
Select Export Now.

Data can be imported to Bitwarden from the web app, browser extension, desktop app, and CLI. Data is encrypted locally before being sent to the server for storage.
While some item types cannot be imported, you can still add them to a vault:
Upload file attachments to the new vault individually.
Re-create Sends in the new vault.
Para importar datos a tu caja fuerte:
Inicia sesión en la caja fuerte web en https://vault.bitwarden.com, https://vault.bitwarden.eu, o
https://your.bitwarden.domain.comsi es autoalojado.Seleccione Herramientas → Importar datos desde la navegación:
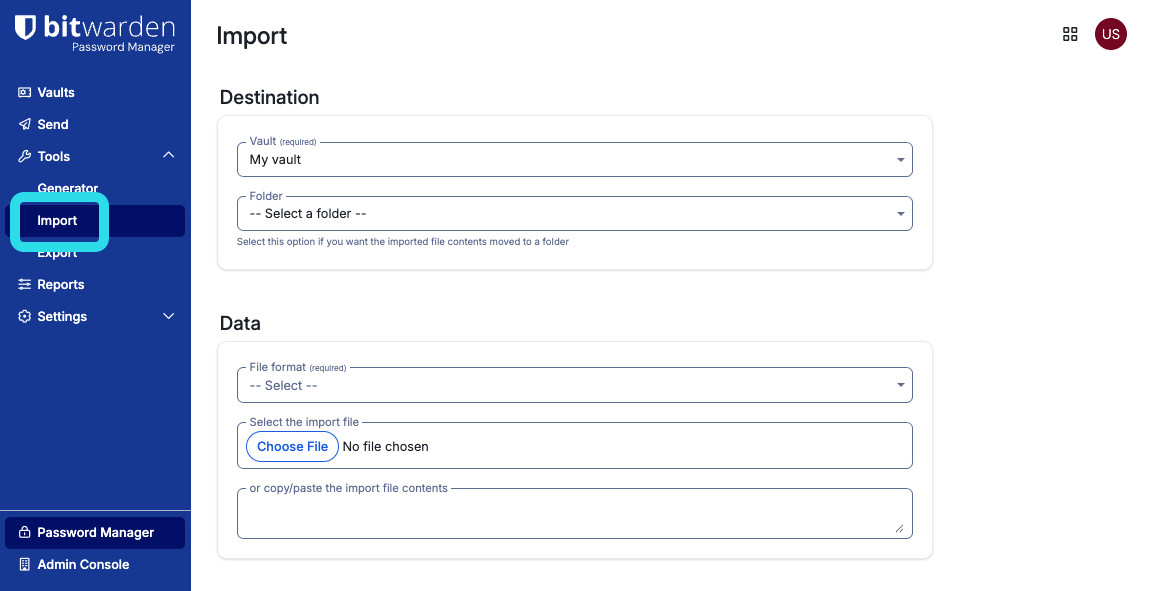
Import items Como asistente, no puedo visualizar ni interactuar con menús desplegables. Sin embargo, puedo ayudarte a traducir cualquier texto del inglés al español. Por favor, proporciona el texto que necesitas traducir.
Destino de importación: Seleccione el destino de importación, como su caja fuerte individual o una caja fuerte organizacional a la que tenga acceso.
Carpeta o Colección: Seleccione si desea que el contenido importado se mueva a una carpeta específica o a una colección de la organización a la que tiene acceso.
Formato de archivo : seleccione el formato del archivo de importación.
Seleccione Elegir Archivo y añada el archivo para importar o copiar/pegar el contenido de su archivo en el cuadro de entrada.
warningLa importación no verifica si los elementos en el archivo a importar ya existen en su caja fuerte. Si importas múltiples archivos o importas archivos con elementos ya en tu caja fuerte, esto creará duplicados.
Seleccione Importar datos para activar la importación. Si está importando un archivo
.jsonprotegido por contraseña, ingrese la contraseña en la ventana Confirmar importar caja fuerte que aparecerá.Después de importar con éxito, elimina el archivo fuente de importación de tu computadora. Esto te protegerá en caso de que tu computadora sea comprometida.

Elementos adicionales como archivos adjuntos, Envíos, y basura necesitarán ser subidos manualmente a tu caja fuerte.
If an “Import error” message appears, no data was added to your vault. Fix the import file issue and try again.