Import from Keeper
Quickly transfer data from Keeper Password Manager to Bitwarden using one of two methods:
Using a Bitwarden browser extension or desktop app, import data directly without needing to download a file.
Using any Bitwarden app, download an export from your Keeper account and import it into Bitwarden.
To import Keeper data directly to Bitwarden, without needing to download an export file and transfer data manually:
In the Bitwarden desktop app or browser extension, open the Import page:
On desktop apps, select Import from the navigation.
On browser extensions, navigate to Settings > Vault options > Import.
Choose the Vault you want to import to and, optionally, a Folder or Collection to add imported data to.
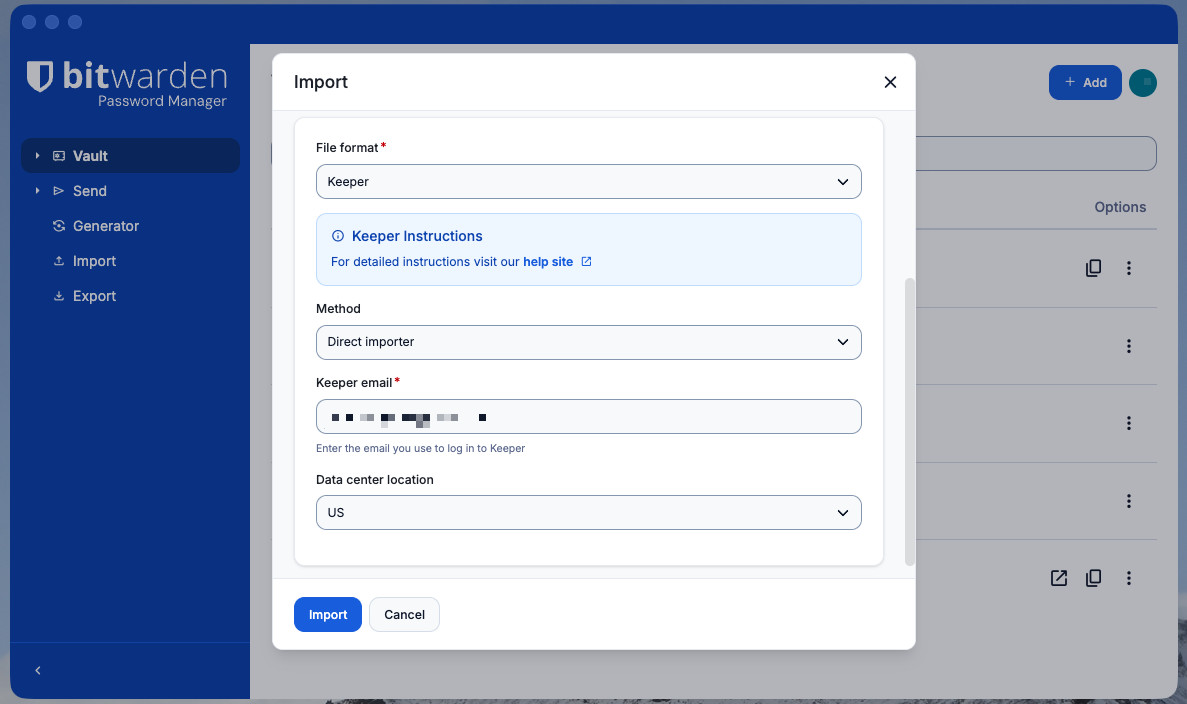
Import directly from Keeper From the File format dropdown, select Keeper.
From the Method dropdown, select Direct importer.
Enter your Keeper email and Data center location.
tipYour Data center location correlates to the region you select when you log in to Keeper. It can also be found in the URL of your Keeper vault when logged in on the web (for example,
keepersecurity.comis US,keepersecurity.euis EU, and so on).Select Import and, when prompted, complete your required authentication steps for Keeper. This requires your Master Password or SSO and some form of Device Approval. Here are two examples of what this will look like:
As a personal user of Keeper, you would typically:
Select a Device approval method to use. For personal users this can be:
An Email sent to the inbox attached to your Keeper account.
A Keeper Push notification that you can approve from the Keeper web app.
A Two-factor method you're using for your Keeper account.
noteBitwarden currently supports the Keeper Text Message, Authenticator App, and Keeper DNA options for two-factor authentication.
Enter your Keeper Master Password.

To export data from the Keeper web app:
Select your account email in the top corner of the web app and select Settings from the dropdown:
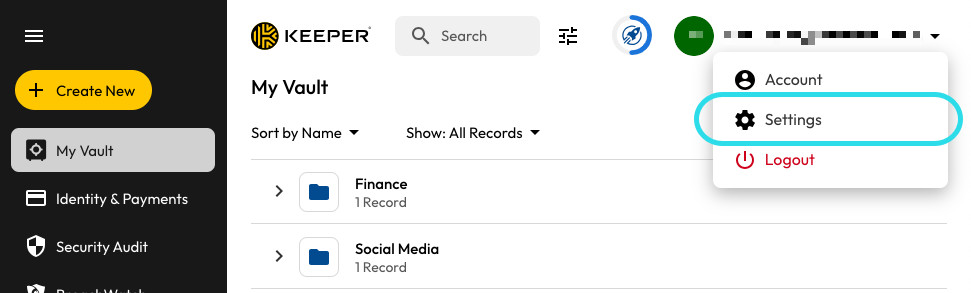
Export from Keeper Select Export from the pop-up window.
Choose the CSV or JSON export file type.
Select Export.
Enter your Keeper Master Password.
Select Export Now.

Data can be imported to Bitwarden from the web app, browser extension, desktop app, and CLI. Data is encrypted locally before being sent to the server for storage.
While some item types cannot be imported, you can still add them to a vault:
Upload file attachments to the new vault individually.
Re-create Sends in the new vault.
Um Daten in Ihren Tresor zu importieren:
Melden Sie sich im Web-Tresor unter https://vault.bitwarden.com, https://vault.bitwarden.eu oder
https://your.bitwarden.domain.coman, wenn selbst gehostet wird.Wählen Sie Werkzeuge → Daten importieren aus der Navigation:
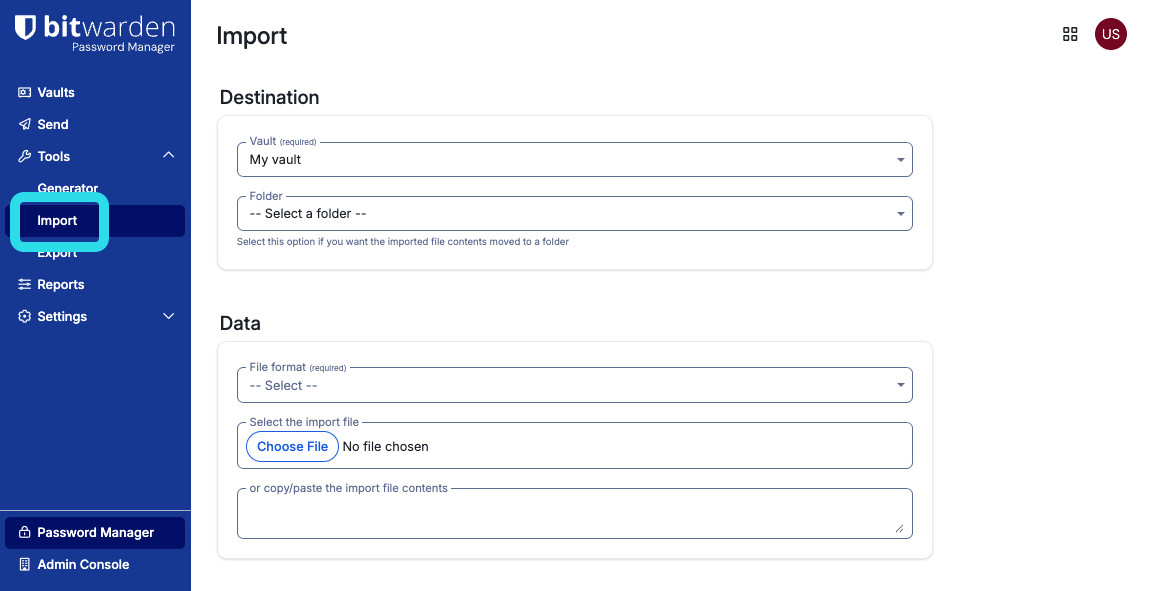
Import items Vervollständigen Sie die folgenden Felder aus den Dropdown-Menüs:
Importziel: Wählen Sie das Importziel, wie zum Beispiel Ihren individuellen Tresor oder einen organisatorischen Tresor, auf den Sie Zugriff haben.
Ordner oder Sammlung: Wählen Sie aus, ob Sie den importierten Inhalt in einen bestimmten Ordner oder in eine Sammlung der Organisation verschieben möchten, auf die Sie Zugriff haben.
Dateiformat : Wählen Sie das Format der Importdatei.
Wählen Sie Datei auswählen und fügen Sie die Datei zum Import hinzu oder kopieren/einfügen Sie den Inhalt Ihrer Datei in das Eingabefeld.
warningBeim Importieren wird nicht geprüft, ob Elemente in der zu importierenden Datei bereits in Ihrem Tresor vorhanden sind. Wenn Sie mehrere Dateien importieren oder Dateien mit Elementen importieren, die bereits in Ihrem Tresor vorhanden sind, werden Duplikate erstellt.
Wählen Sie Daten importieren, um den Import auszulösen. Wenn Sie eine passwortgeschützte
.jsonDatei importieren, geben Sie das Passwort in das Fenster Tresor Import bestätigen ein, das erscheinen wird.Nach erfolgreichem Import, löschen Sie die Import-Quelldatei von Ihrem Computer. Dies wird Sie schützen, falls Ihr Computer kompromittiert wird.

Zusätzliche Einträge wie Dateianhänge, Sends und Müll müssen manuell in Ihren Tresor hochgeladen werden.
If an “Import error” message appears, no data was added to your vault. Fix the import file issue and try again.