Import from Keeper
Quickly transfer data from Keeper Password Manager to Bitwarden using one of two methods:
Using a Bitwarden browser extension or desktop app, import data directly without needing to download a file.
Using any Bitwarden app, download an export from your Keeper account and import it into Bitwarden.
To import Keeper data directly to Bitwarden, without needing to download an export file and transfer data manually:
In the Bitwarden desktop app or browser extension, open the Import page:
On desktop apps, select Import from the navigation.
On browser extensions, navigate to Settings > Vault options > Import.
Choose the Vault you want to import to and, optionally, a Folder or Collection to add imported data to.
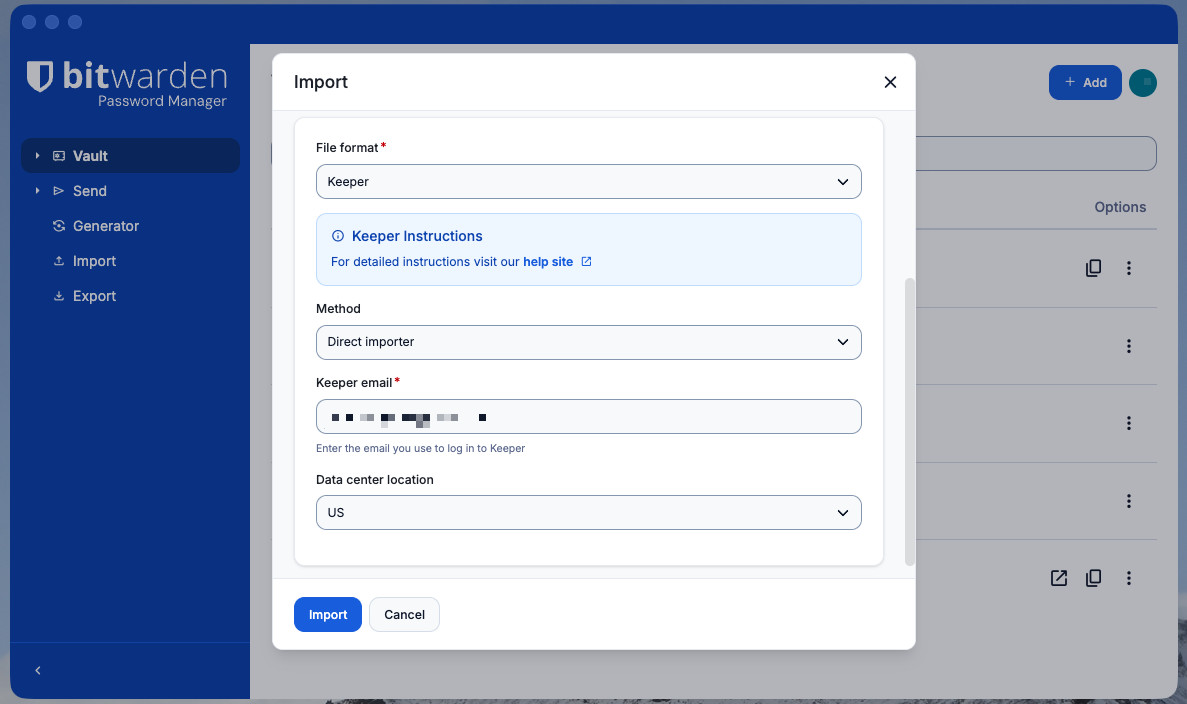
Import directly from Keeper From the File format dropdown, select Keeper.
From the Method dropdown, select Direct importer.
Enter your Keeper email and Data center location.
tipYour Data center location correlates to the region you select when you log in to Keeper. It can also be found in the URL of your Keeper vault when logged in on the web (for example,
keepersecurity.comis US,keepersecurity.euis EU, and so on).Select Import and, when prompted, complete your required authentication steps for Keeper. This requires your Master Password or SSO and some form of Device Approval. Here are two examples of what this will look like:
As a personal user of Keeper, you would typically:
Select a Device approval method to use. For personal users this can be:
An Email sent to the inbox attached to your Keeper account.
A Keeper Push notification that you can approve from the Keeper web app.
A Two-factor method you're using for your Keeper account.
noteBitwarden currently supports the Keeper Text Message, Authenticator App, and Keeper DNA options for two-factor authentication.
Enter your Keeper Master Password.

To export data from the Keeper web app:
Select your account email in the top corner of the web app and select Settings from the dropdown:
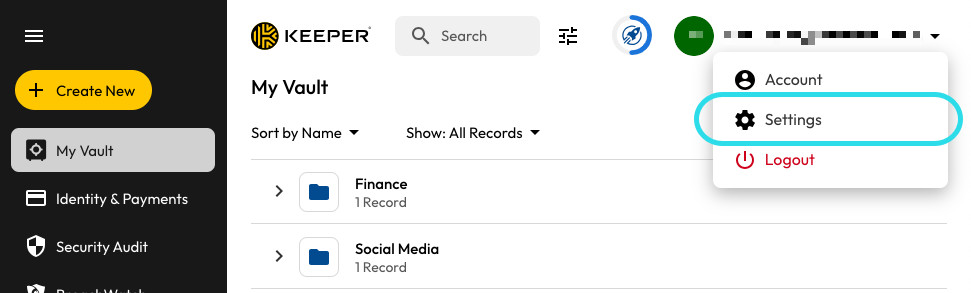
Export from Keeper Select Export from the pop-up window.
Choose the CSV or JSON export file type.
Select Export.
Enter your Keeper Master Password.
Select Export Now.

Data can be imported to Bitwarden from the web app, browser extension, desktop app, and CLI. Data is encrypted locally before being sent to the server for storage.
While some item types cannot be imported, you can still add them to a vault:
Upload file attachments to the new vault individually.
Re-create Sends in the new vault.
Pour importer des données dans votre coffre :
Connectez-vous au coffre web à https://vault.bitwarden.com, https://vault.bitwarden.eu, ou
https://your.bitwarden.domain.comsi auto-hébergé.Sélectionnez Outils → Importer des données depuis la navigation :
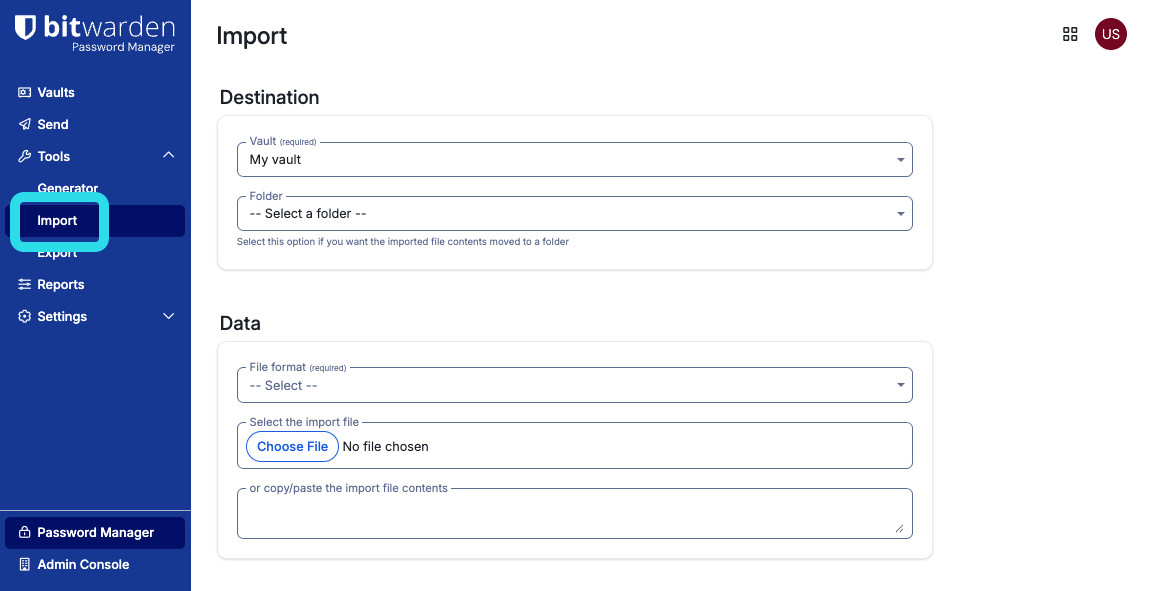
Import items Complétez les champs suivants à partir des menus déroulants:
Destination d'importation: Sélectionnez la destination d'importation, comme votre coffre individuel ou un coffre organisationnel auquel vous avez accès.
Dossier ou Collection: Sélectionnez si vous souhaitez que le contenu importé soit déplacé vers un dossier spécifique ou une collection d'organisation à laquelle vous avez accès.
Format de fichier : Sélectionnez le format du fichier d'importation.
Sélectionnez Choisir un fichier et ajoutez le fichier à importer ou copier/coller le contenu de votre fichier dans la boîte de saisie.
warningL'importation ne vérifie pas si les éléments dans le fichier à importer existent déjà dans votre coffre. Si vous importez plusieurs fichiers ou importez des fichiers avec des éléments déjà dans votre coffre, cela créera des doublons.
Sélectionnez Importer des données pour déclencher l'importation. Si vous importez un fichier
.jsonprotégé par un mot de passe, entrez le mot de passe dans la fenêtre Confirmer l'importation du coffre qui apparaîtra.Après une importation réussie, supprimez le fichier source d'importation de votre ordinateur. Cela vous protégera dans l'éventualité où votre ordinateur serait compromis.

Des éléments supplémentaires tels que les fichiers joints, les envois, et les déchets devront être téléversés manuellement dans votre coffre.
If an “Import error” message appears, no data was added to your vault. Fix the import file issue and try again.