Secrets Manager Quick Start
tip
If you're a developer, you may prefer Developer Quick Start. The article you're currently on will cover Secrets Manager from an administrative and setup point of view.
Bitwarden Secrets Manager enables developers, DevOps, and cybersecurity teams to centrally store, manage, and deploy secrets at scale. Use the Secrets Manager web app to add and organize secrets, create systems of permissions to fit your needs, and generate access tokens for your applications.
Once Secrets Manager is set up, learn how to inject secrets into your machines and applications with the Developer Quick Start guide.
Access Secrets Manager
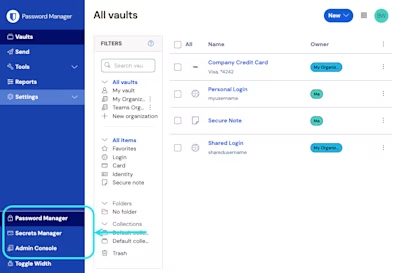
Log in to the Bitwarden web app and select Secrets Manager from the product switcher in the navigation menu:
If you or your organization are not active Secrets Manager users yet, click Try it now:

Owners are taken to their organization's Subscription page for Secrets Manager.
Users are asked if they want to send their organization owner an email requesting Bitwarden Secrets Manager access. They can edit the email before sending.

Request access to Secrets Manager

Set up Secrets Manager
Add Secrets Manager to your organization
Only owners can add Secrets Manager to their organization. To start using Secrets Manager:
In Admin Console for your organization, go to Billing → Subscription.
In the More from Bitwarden section, check Subscribe to Secrets Manager:

Add Secrets Manager Depending on your organization's plan:
If you are on the Free plan, select Submit.
If you are on an upgraded plan, enter the desired number of Subscription seats (up to your Password Manager subscription's total) and Additional machine accounts beyond your plan's included amount (20 for Teams and 50 for Enterprise). Select Save.
note
Secrets Manager will automatically scale your user seats and machine accounts when new users or machine accounts are added. At any time, you can go to Billing → Subscription to change the total allowed user seats and machine accounts. To set a scaling limit, select Limit subscription and Limit machine accounts:

Limit subscription seats and machine accounts


Once activated, you can open Secrets Manager from the product switcher:
Give members access
tip
Before proceeding, we recommend creating groups for Secrets Manager users. Groups let you to quickly assign access to secrets once users have Secrets Manager access.
Organization owners and admins can grant access to Secrets Manager. To give members access:
In Admin Console for your organization, go to Members.
Select which users you want to add to the Secrets Manager.
Click the icon and select Activate Secrets Manager:

Alternatively, go to Members → Member role and select This user can access Secrets Manager:

note
Once Secrets Manager access is granted to a user (or yourself), you may need to refresh your browser for Secrets Manager to appear.
First steps
Your secrets vault
Use the product switcher to open the Secrets Manager web app. If this is your first time opening the app you'll have an empty vault, but eventually it'll be full of your projects and secrets:

Let's start filling your vault.
Add a project
Projects are collections of secrets logically grouped together for management access by your DevOps, cybersecurity, or other internal teams. It's important to take into account, when creating your projects, that projects will be the primary structures through which you assign members access to secrets. To create a project:
Use the New dropdown to select Project:

Create a project Enter a Project name.
Select the Save button.

Assign members to your project
Adding organization members to your project will allow those users to interact with the project's secrets. To add people to your project:
In the new project, select the People tab.
From the People dropdown, type or select the member(s) or group(s) to add to the project. Once you've selected the right people, use the Add button:

Add people to a project Once members or groups are added to the project, set a level of Permissions for those members or groups. Members and groups can have one of the following levels of permission:
Can read: Members/groups will be able to view existing secrets in this project.
Can read, write: Members/groups will be able to view existing secrets and create new secrets in this project.

Add secrets
Now that you have a project with a handful of members who can help you manage it, let's add some secrets to the project. Secrets are sensitive key-value pairs stored in your vault, typically things that should never be exposed in plain code or transmitted over unencrypted channels, for example:
API Keys
Application Configurations
Database Connection Strings
Environment Variables
You can import secrets directly to your vault as a .json file or add secrets manually:
To import your secrets:
Review this document for help properly formatting an import file.
Select Settings → Import data from the left-hand navigation:

Import data Select Choose File and choose a
.jsonfile for import.


Add a machine account
Now that you've got a project full of secrets, it's time to start constructing machine access to those secrets. Machine accounts represent non-human machine users, or groups of machine users, that require programmatic access to some of the secrets stored in your vault. Machine accounts are used to:
Appropriately scope the selection of secrets a machine user has access to.
Issue access tokens to facilitate programmatic access to, and the ability to decrypt, edit, and create secrets.
To add a machine account for this project:
Use the New dropdown to select Machine account:

New machine account Enter a Machine account name and select Save.
Open the machine account and, in the Projects tab, type or select the name of the project(s) that this machine account should be able to access. For each added project, select a level of Permissions:
Can read: Machine account can retrieve secrets from assigned projects.
Can read, write: Machine account can retrieve and edit secrets from assigned projects, as well as create new secrets in assigned projects or create new projects.

Create an access token
Access tokens facilitate programmatic access to, and the ability to decrypt and edit, secrets stored in your vault. Access tokens are issued to a particular machine account, and will give any machine that they're applied to the ability to access only the secrets associated with that machine account. To create an access token:
Select Machine accounts from the navigation.
Select the machine account to create an access token for, and open the Access tokens tab:

Create access token Select the Create access token button.
On the Create Access Token panel, provide:
A Name for the token.
When the token Expires. By default, Never.
Select the Create access token button when you're finished configuring the token.
A window will appear printing your access token to the screen. Copy your token to somewhere safe before closing this window, as your token cannot be retrieved later:

Access token example


This access token is the authentication vehicle through which you'll be able to script secret injection to your machines and applications.
Next steps
Now that you've got the hang of creating the infrastructure for securely managing secrets, and of creating pathways for machine access to secrets, let's continue on to the Developer Quick Start guide.
Or, for more information about Secrets Manager: