Cloudflare Zero Trust SSO
This article contains Cloudflare Zero Trust-specific help for configuring login with SSO. Cloudflare Zero Trust is a cloud-based identity and access management platform that can integrate with multiple identity providers (IdPs). You can also configure gateways and tunneling for secure access to the platform.
note
Cloudflare Zero Trust can be configured with any IdP that operates using SAML 2.0 or OIDC SSO configurations. If you are not familiar with these configurations, refer to these articles:
Cloudflare Zero Trust is a cloud-based proxy identity and access management platform that can integrate with multiple identity providers (IdPs). The benefit of using Cloudflare Zero Trust in addition to your standard IdP is its ability to configure multiple IdPs for login. Cloudflare Zero Trust can provide SSO access to Bitwarden from multiple separate directories, or sets of users within a directory.
note
Cloudflare will only support SAML via the Access Application Gateway. This means that the SAML 2.0 must be selected in the Bitwarden configuration. OIDC authentication can still be configured from the IdP and Cloudflare.
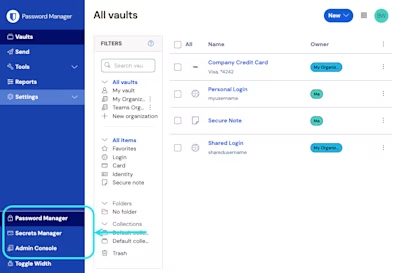
Log in to the Bitwarden web app and open the Admin Console using the product switcher:
Open your organization's Settings → Single sign-on screen:
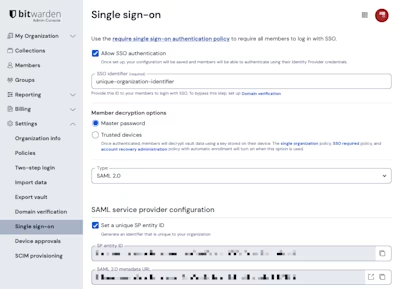
If you haven't already, create a unique SSO identifier for your organization and select SAML from the the Type dropdown. Keep this screen open for easy reference.
You can turn off the Set a unique SP entity ID option at this stage if you wish. Doing so will remove your organization ID from your SP entity ID value, however in almost all cases it is recommended to leave this option on.
tip
There are alternative Member decryption options. Learn how to get started using SSO with trusted devices or Key Connector.
Create a Cloufdlare Zero Trust login method:
Navigate to Cloudflare Zero Trust and log in or create an account.
Configure a domain, which will act as the URL used by your users to access your applications or App Launcher, for example
https://my-business.cloudflareaccess.com/. From the Cloudflare Zero Trust menu , select Settings → Custom Pages:
Team domain setting Begin configuring the first login method by navigating to Settings → Authentication → Add new.
Select the login method to connect to Cloudflare Zero Trust. If the IdP you are using is not present on the IdP list, use the SAML or OIDC generic options. In this article, Okta will be used as an example:

Cloudflare Zero Trust IdP list note
Google Workspace users should select the generic SAML setup during this step. The Google Workspace login method may result in errors.
After selecting your chosen IdP login method, follow the in-product guide provided by Cloudflare for integrating your IdP.


note
If the IdP you are using has a support groups feature, this option must be disabled. Bitwarden does not support group based claims, enabling this option will result in an XML element error on the Bitwarden end.
After an IdP has been configured, you'll have to create a Cloudflare Zero Trust application for Bitwarden. In this example we'll create a SAML application:
1. Navigate to Access → Applications → Add an application and then select SaaS.

2. On the following screen, add an Application name such as Bitwarden. Then, Select the authentication protocol, SAML. Once complete, select Add application.

3. In the Bitwarden web vault, open your organization and navigate to the Settings → Single Sign-On screen. Use information from the web vault to fill-in information on the Configure app screen:
Key | Description |
|---|---|
Application | Enter |
Entity ID | Copy the SP entity ID from the Bitwarden Single Sign-On page into this field. |
Assertion Consumer Service URL | Copy the Assertion consumer service (ACS) URL from the Bitwarden Single Sign-On page into this field. |
Name ID Format | Select Email from the dropdown menu. |
note
For the generic OIDC configuration, the Auth URL, Token URL, and Certificate URL can be located with the well-known URL.
4. Scroll down to the Identity providers menu. Select the IdP(s) that you configured in the previous section, scroll back to the top, and select Next.
5. Next, create access policies for user access to the application. Complete the Policy name, Action, and Session duration fields for each policy.
6. You can choose to assign a group policy (Access → Groups) or explicit user policy rules (such as emails, "emails ending in", "country", or "everyone"). In the following example, the group "Anon Users" has been included in the policy. An additional rule has been added as well to include emails ending in the chosen domain:

note
You can also apply user access through the App Launcher for access to the Bitwarden login with SSO shortcut. This can be managed by navigating to Authentication → App Launcher → Manage. The application policies in the above example can be duplicated or generated here.
7. Once access policies have been configured, scroll to the top and select Next.
8. While on the Setup screen, copy the following values and input them into their respective fields on the Bitwarden Single Sign-On page:
Key | Description |
|---|---|
SSO endpoint | The SSO endpoint directs where your SaaS application will send login requests. This value will be entered into the Single Sign On Service URL field in Bitwarden. |
Access Entity ID or Issuer | The Access Entity ID or Issuer is the unique identifier of your SaaS application. This will value will be entered into the Entity ID field on Bitwarden. |
Public key | The Public key is the access public certificate that will be used to verify your identity. This value will be entered into the X509 Public Certificate field on Bitwarden. |
9. After the values have been entered into Bitwarden, select Save on the Bitwarden Single Sign-On screen and select Done on the Cloudflare page to save the application.
10. To create a bookmark to the Bitwarden login with SSO screen, select Add an application → Bookmark. Check that the Bookmark is visible in the App launcher.
Once your configuration is complete, test it by navigating to https://vault.bitwarden.com or https://vault.bitwarden.eu, entering your email address and selecting the Use single sign-on button:
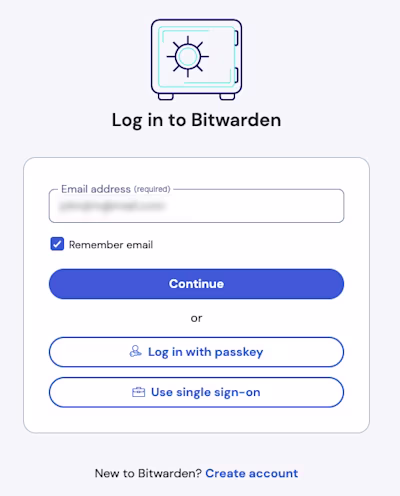
Enter the configured organization identifier and select Log In. If your implementation is successfully configured, you will be redirected to a Cloudflare Access screen, where you can select the IdP to login with:

After selecting your IdP, you will be directed to your IdP login page. Enter in the information used to login via your IdP:

After you authenticate with your IdP credentials, enter your Bitwarden credentials to decrypt your vault!