Import from Keeper
Quickly transfer data from Keeper Password Manager to Bitwarden using one of two methods:
Using a Bitwarden browser extension or desktop app, import data directly without needing to download a file.
Using any Bitwarden app, download an export from your Keeper account and import it into Bitwarden.
To import Keeper data directly to Bitwarden, without needing to download an export file and transfer data manually:
In the Bitwarden desktop app or browser extension, open the Import page:
On desktop apps, select Import from the navigation.
On browser extensions, navigate to Settings > Vault options > Import.
Choose the Vault you want to import to and, optionally, a Folder or Collection to add imported data to.
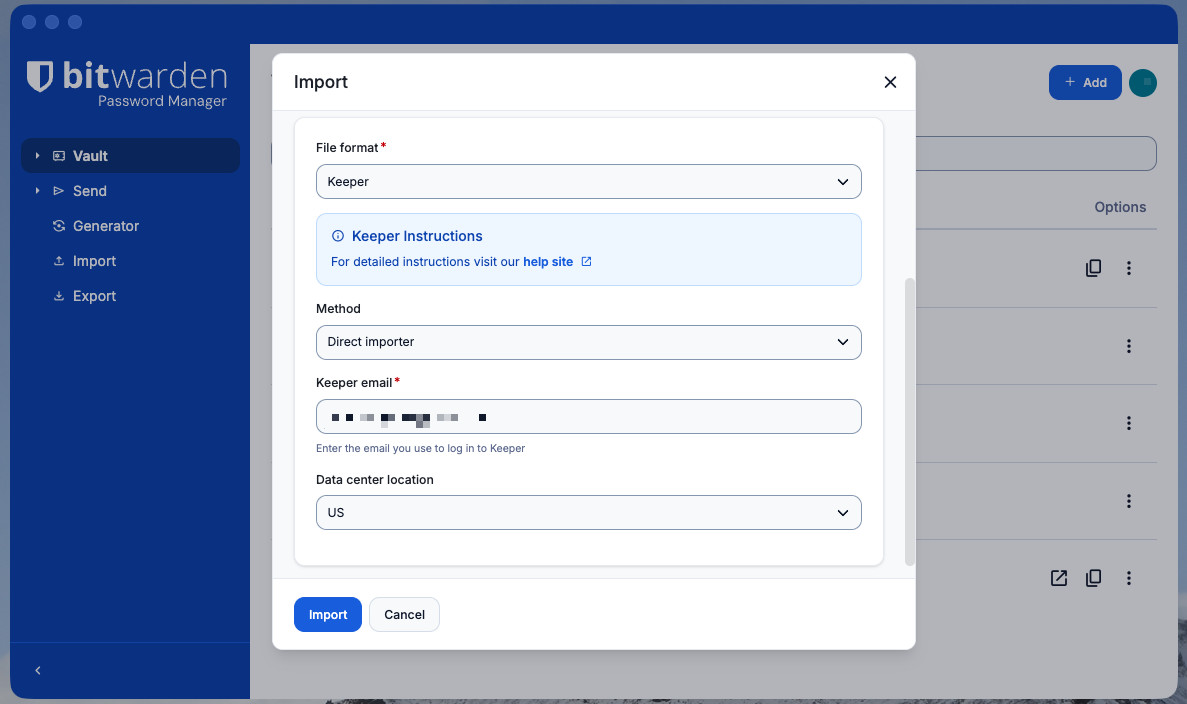
Import directly from Keeper From the File format dropdown, select Keeper.
From the Method dropdown, select Direct importer.
Enter your Keeper email and Data center location.
tipYour Data center location correlates to the region you select when you log in to Keeper. It can also be found in the URL of your Keeper vault when logged in on the web (for example,
keepersecurity.comis US,keepersecurity.euis EU, and so on).Select Import and, when prompted, complete your required authentication steps for Keeper. This requires your Master Password or SSO and some form of Device Approval. Here are two examples of what this will look like:
As a personal user of Keeper, you would typically:
Select a Device approval method to use. For personal users this can be:
An Email sent to the inbox attached to your Keeper account.
A Keeper Push notification that you can approve from the Keeper web app.
A Two-factor method you're using for your Keeper account.
noteBitwarden currently supports the Keeper Text Message, Authenticator App, and Keeper DNA options for two-factor authentication.
Enter your Keeper Master Password.

To export data from the Keeper web app:
Select your account email in the top corner of the web app and select Settings from the dropdown:
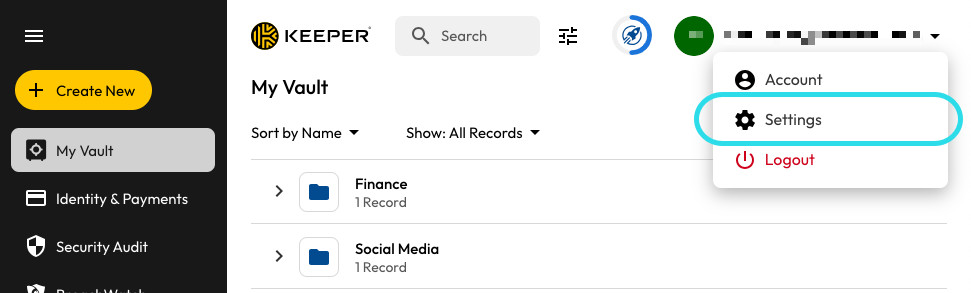
Export from Keeper Select Export from the pop-up window.
Choose the CSV or JSON export file type.
Select Export.
Enter your Keeper Master Password.
Select Export Now.

Data can be imported to Bitwarden from the web app, browser extension, desktop app, and CLI. Data is encrypted locally before being sent to the server for storage.
While some item types cannot be imported, you can still add them to a vault:
Upload file attachments to the new vault individually.
Re-create Sends in the new vault.
Om gegevens naar uw kluis te importeren:
Meld u aan bij de webkluis op https://vault.bitwarden.com, https://vault.bitwarden.eu of
https://your.bitwarden.domain.comals u zelf host.Selecteer Extra → Gegevens importeren in de navigatie:
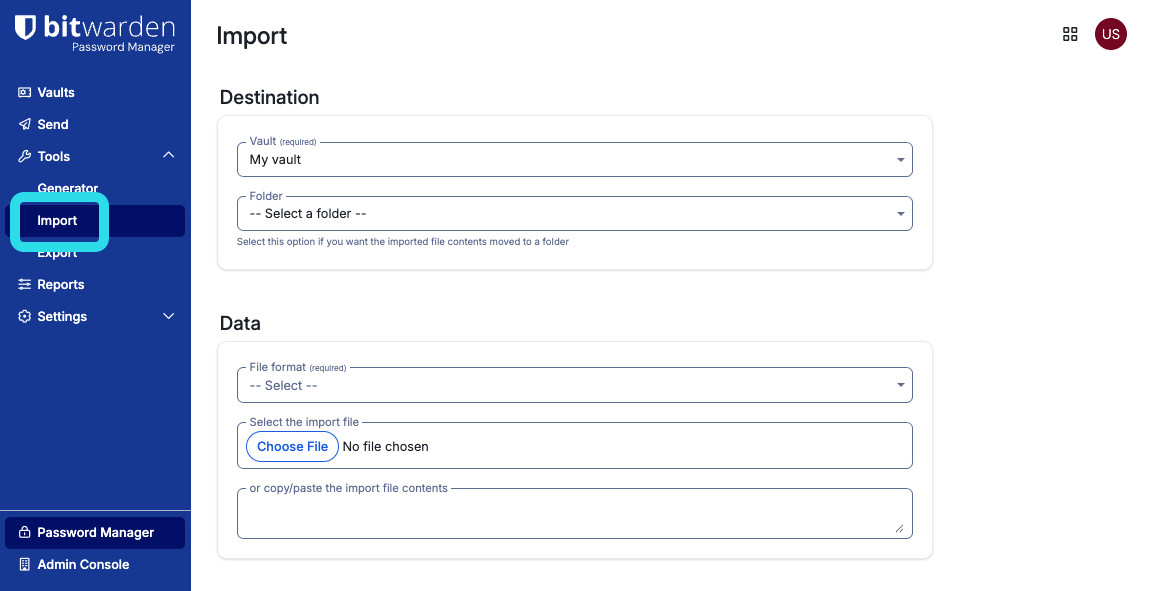
Import items Vul de volgende velden in de vervolgkeuzemenu's in:
Bestemming importeren: Selecteer de importbestemming, zoals je individuele kluis of een organisatiekluis waartoe je toegang hebt.
Map of Collectie: Selecteer of je de geïmporteerde inhoud wilt verplaatsen naar een specifieke map of organisatieverzameling waartoe je toegang hebt.
Bestandsformaat: Selecteer het bestandsformaat voor importeren.
Selecteer Kies bestand en voeg het te importeren bestand toe of kopieer/plak de inhoud van je bestand in het invoervak.
warningBij het importeren wordt niet gecontroleerd of items in het te importeren bestand al bestaan in je kluis. Als je meerdere bestanden importeert of bestanden importeert met items die al in je kluis zitten, worden er duplicaten gemaakt.
Selecteer Gegevens importeren om het importeren te starten. Als je een wachtwoordbeveiligd
.json-bestandimporteert, voer dan het wachtwoord in in het venster Bevestig kluisimport dat verschijnt.Na een geslaagde import verwijdert u het importbronbestand van uw computer. Dit beschermt je in het geval dat je computer wordt aangetast.

Extra items zoals bestandsbijlagen, verzendingen en prullenbak moeten handmatig worden geüpload naar je kluis.
If an “Import error” message appears, no data was added to your vault. Fix the import file issue and try again.