Generic OIDC
Users who authenticate their identity using SSO will be required to enter an SSO identifier that indicates the organization (and therefore, the SSO integration) to authenticate against. To set a unique SSO Identifier:
Log in to the Bitwarden web app and open the Admin Console using the product switcher:
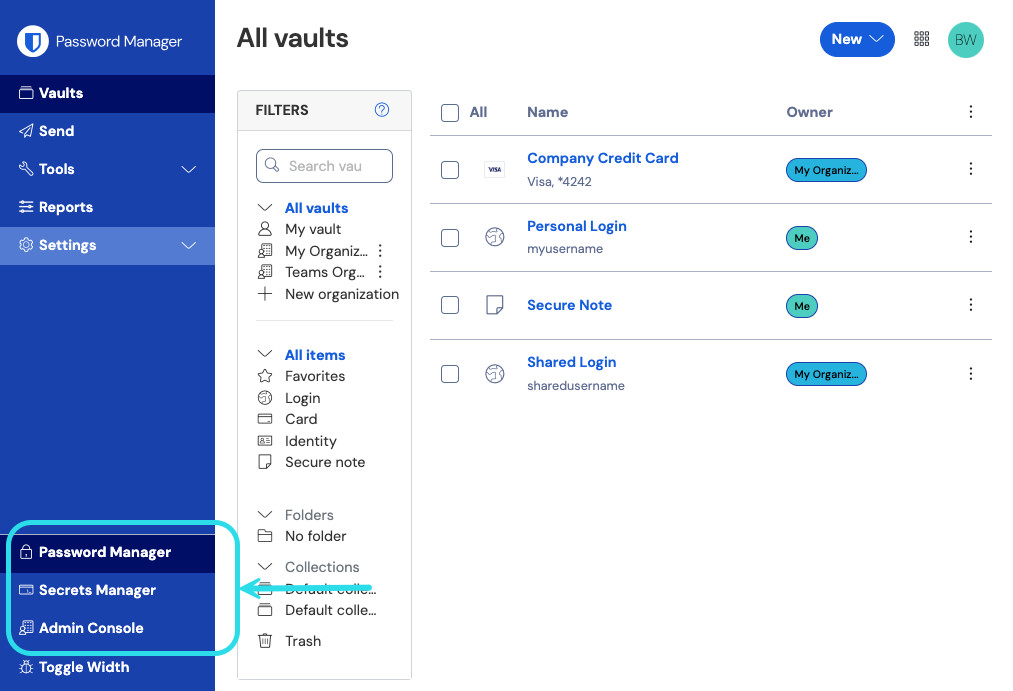
Product switcher Navigate to Settings → Single sign-on, and enter a unique SSO Identifier for your organization:

Enter an identifier Proceed to Step 2: Enable login with SSO.

tip
You will need to share this value with users once the configuration is ready to be used.
Once you have your SSO identifier, you can proceed to enabling and configuring your integration. To enable login with SSO:
On the Settings → Single sign-on view, check the Allow SSO authentication checkbox:

OIDC configuration From the Type dropdown menu, select the OpenID Connect option. If you intend to use SAML instead, switch over the the SAML Configuration guide.

tip
There are alternative Member decryption options. Learn how to get started using SSO with trusted devices or Key Connector.
From this point on, implementation will vary provider-to-provider. Jump to one of our specific implementation guides for help completing the configuration process:
Provider | Guide |
|---|---|
Azure | |
Okta |
The following sections will define fields available during single sign-on configuration, agnostic of which IdP you are integration with. Fields that must be configured will be marked (required).
tip
Unless you are comfortable with OpenID Connect, we recommend using one of the above implementation guides instead of the following generic material.
Field | Description |
|---|---|
Callback Path | (Automatically generated) The URL for authentication automatic redirect. For cloud-hosted customers, this is |
Signed Out Callback Path | (Automatically generated) The URL for sign-out automatic redirect. For cloud-hosted customers, this is |
Authority | (Required) The URL of your authorization server ("Authority"), which Bitwarden will perform authentication against. For example, |
Client ID | (Required) An identifier for the OIDC client. This value is typically specific to a constructed IdP app integration, for example an Azure app registration or Okta web app. |
Client Secret | (Required) The client secret used in conjunction with the client ID to exchange for an access token. This value is typically specific to a constructed IdP app integration, for example an Azure app registration or Okta Web App. |
Metadata Address | (Required if Authority is not valid) A Metadata URL where Bitwarden can access authorization server metadata as a JSON object. For example,
|
OIDC Redirect Behavior | (Required) Method used by the IdP to respond to authentication requests from Bitwarden. Options include Form POST and Redirect GET. |
Get claims from user info endpoint | Enable this option if you receive URL too long errors (HTTP 414), truncated URLS, and/or failures during SSO. |
Additional/custom scopes | Define custom scopes to be added to the request (comma-delimited). |
Additional/custom user id claim types | Define custom claim type keys for user identification (comma-delimited). When defined, custom claim types are searched for before falling back on standard types. |
Additional/custom email claim types | Define custom claim type keys for users' email addresses (comma-delimited). When defined, custom claim types are searched for before falling back on standard types. |
Additional/custom name claim types | Define custom claim type keys for users' full names or display names (comma-delimited). When defined, custom claim types are searched for before falling back on standard types. |
Requested authentication context class reference values | Define authentication context class reference identifiers ( |
Expected "acr" Claim Value in Response | Define the |
An email address is required for account provisioning, which can be passed as any of the attributes or claims in the below table.
A unique user identifier is also highly recommended. If absent, email will be used in its place to link the user.
Attributes/claims are listed in order of preference for matching, including fallbacks where applicable:
Value | Claim/Attribute | Fallback claim/attribute |
|---|---|---|
Unique ID | Configured Custom User ID Claims | |
Configured Custom Email Claims urn:oid:0.9.2342.19200300.100.1.3 | Preferred_Username | |
Name | Configured Custom Name Claims urn:oid:2.16.840.1.113730.3.1.241 | First Name + “ “ + Last Name (see below) |
First Name | urn:oid:2.5.4.42 | |
Last Name | urn:oid:2.5.4.4 |