Rapid7 SIEM
Rapid7 is a security platform offering several ways to analyze vulnerabilities and threat data, such as security information and event management (SIEM). With the Rapid7 Bitwarden integration, developed by the team at Rapid7, organizations can monitor Bitwarden organization and event activity with the Bitwarden app on Rapid7's InsightConnect software.
note
The Bitwarden plugin on InsightConnect is available for cloud and Insight Orchestrator users. This guide will demonstrate the cloud setup. For more information on Insight Orchestrator, see the Rapid7 documentation here.
Setup
Create Rapid7 account
To start, you will need an account with Rapid7 with access to InsightConnect. Create an account on the Rapid7 website.
Download the Bitwarden plugin
Access the InsightConnect dashboard.
On the navigation menu, select SETTINGS → Plugins & Tools.

Rapid7 Plugins Search Bitwarden in the Extension catalogue and install the plugin.
Return to your Extension library and select the Bitwarden plugin, then Create Connection. Keep the connection window open, information from the Bitwarden web vault is required to complete the next step.

Bitwarden New Connection In a new tab or window, access your Bitwarden organization's Client ID and Client Secret. Log in to the Bitwarden web app and open the Admin Console using the product switcher:
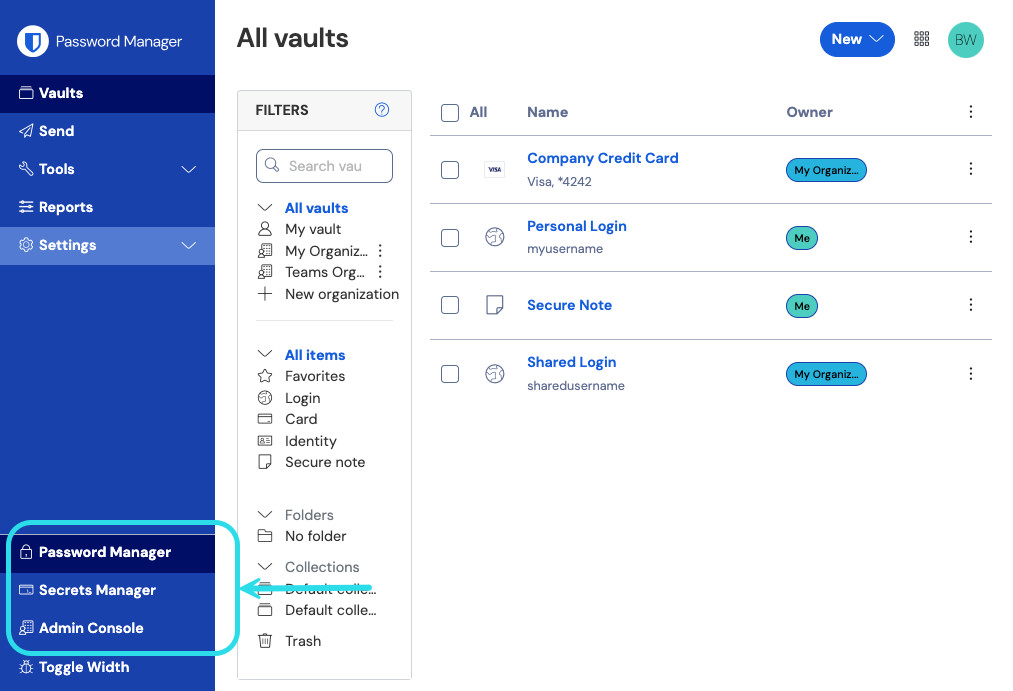
Product switcher Navigate to your organization's Settings → Organization info screen and select the View API key button. You will be asked to re-enter your master password in order to access your API key information.

Organization api info Copy the
client_idandclient_secretvalues. Return to the Create a Cloud Connection window:Paste the
client_idvalue into the Client ID field.Paste the
client_secretvalue into the Client Secret field. In order to access this field, select Add Credential from the Select Credential dropdown menu. Paste theclient_secretvalue in the Secret Key field. Complete any additional Name and Description values you wish to include in the connection.
Once you have input the values, select Save & Test Connection. Rapid7 will run a connection test and indicate if the setup was successful.


note
Your organization API key information is sensitive data. Do not share these values in nonsecure locations.
Create a workflow
To begin monitoring data with Rapid7, create an InsightConnect workflow. This guide will demonstrate creating a cloud workflow and then testing the workflow.
On the main navigation, select WORKFLOWS.
In the right corner of the screen, select Add Workflow to begin.
A window will appear showing different options for creating a workflow. For this example, select Start From Scratch. Advanced users may choose to browse existing templates.

Add Workflow On the Create New Workflow window, complete the following required fields:
Workflow Name: Create a name for the Workflow such as Bitwarden Logs.
Time Savings: Time that this Workflow will save.
Optional: Include Summary and Tags for the Workflow as desired.
Select Create once you have finished.

Create workflow trigger
Click on the new trigger in the workflow editor. In the Select a Trigger window, select select the trigger you would like to use to initiate your workflow, such as API Trigger. Complete the following required fields:
Name: Provide a name for the new trigger.
Variable: Choose variable such as
Event.Data Type: Select String.
Optional: Enter a Trigger Description to keep notes about the use of the trigger.
Select Close once you have completed the setup.
Add a workflow step
On the workflow editor, select the plus icon to add a new step.

Add Step Select Action to add a new action. Select Bitwarden from the plugins list.
On the Select an Action screen, choose the action you with to monitor. For this example, we will be selecting List Events. Select Continue once you have made your selection.

List Events Action Choose the Cloud option for running. On the connection drop down, choose the Bitwarden connection we established previously in the guide. Select Continue once complete.
On the Configure Details screen, complete the optional fields as required by your setup, such as Start Date.
Select Save Step once you have customized the step details.


note
Rapid7 allows several actions to be created and chained together. You may repeat this step with additional Bitwarden actions to report more information. See a complete list of Bitwarden integration actions here.
Test workflow
Return to the Workflow Editor and select Test to try out the workflow. The Test Workflow window will appear. Select Test Workflow at the bottom of the window to run the process.
This may take a moment. Once complete, a Job Details window will appear with results of the workflow:

Rapid7 Event Output

Enable workflow
To enable the workflow, select WORKFLOWS from the primary navigation.
Activate the workflow by using the toggle option:

Enable Workflow Once active, reports will be generated based on the trigger settings established on your workflow. View these reports by selecting JOBS on the navigation.

View Rapid7 Jobs

