Autofill From iOS App
Bitwarden makes your passwords and passkeys available for autofill so that you can seamlessly log in to websites and apps while also maintaining strong and secure passwords. Autofill cuts the copying and pasting out of your login routine by detecting vault items that match the service you are logging in to.
Autofilling passkeys, including being prompted by Bitwarden when you create a new passkey, requires iOS 17.0 or higher.
tip
Most autofill scenarios rely on the attribution of URIs to login items. If you are unfamiliar with using URIs, brush up using our Using URIs article.
Please note that custom fields are not currently supported in mobile autofill.
Setup autofill
Autofill on iOS comes in four flavors:
Keyboard autofill: (Recommended) Use this option to make Bitwarden autofill accessible in any iOS app (including web browsers) through a keyboard button or slide-up prompt.
Browser app extension: Use this option to make Bitwarden autofill accessible only in web browser apps, like Safari, through the Share menu.
Long-press a text field: Use this option to autofill from Bitwarden in a larger variety of locations.
tip
It is currently not possible to use auto-fill on iOS if your vault timeout action is set to Log Out and your only enabled two-step login method requires NFC (for example, an NFC YubiKey), as iOS will not allow NFC inputs to interrupt autofill workflows.
Either change your vault timeout action to Lock, or enable another two-step login method.
note
If you are using Argon2id with a KDF memory value higher than 48 MB, a warning dialogue will be displayed every time iOS autofill is initiated or a new Send is created through the Share sheet. To avoid this message, adjust Argon2id settings here or enable unlock with biometrics.
Keyboard autofill
To activate keyboard autofill on iOS for passwords, complete the following steps. This will also activate the slide-up menu for passkey autofill:
Open iOS Settings and then General on your device.
Tap AutoFill & Passwords.
Toggle AutoFill Passwords and Passkeys on and tap Bitwarden in the Autofill From: list:

Setup autofill on iOS tip
We highly recommend deactivating any other autofill service (like Keychain) in the Autofill From: list.
Let's test autofill to make sure it's working properly:
Open an app or website that you aren't currently signed in to.
Tap the username or password field on the login screen. A keyboard will slide up with a matching login (
my_username), or with a Passwords button:
AutoFill on iOS If a matching login is displayed, tap it to autofill. If the Passwords button is displayed, tap it to browse your vault for the login to use. In cases where the Passwords button is displayed, it's probably because there isn't an item in your vault with a matching URI.
note
Are you getting a
Biometric unlock disabled pending verification of master passwordmessage? Learn what to do.
Browser app extension autofill
To enable browser app extension autofill on iOS:
Open your Bitwarden app and tap Settings.
Tap Autofill.
Tap the App extension option in the Autofill section.
Tap the Activate app extension button.
From the share menu that slides up, tap Bitwarden.
A green
Extension Activated!message will indicate success.Let's test the app extension to make sure it's working properly:
Open your device's web browser and navigate to a website that you aren't currently signed in to.
Tap the Share icon.
Scroll down and tap the Bitwarden option:

Bitwarden in the Share menu note
If you have unlock with biometrics enabled, the first time you tap this option you will be prompted to verify your master password.
A Bitwarden screen will slide up on your device and will list matching logins for the website. Tap the item to autofill.
tip
If there are no logins listed, it's probably because there isn't a login in your vault with a matching URI.
Long-press a text field
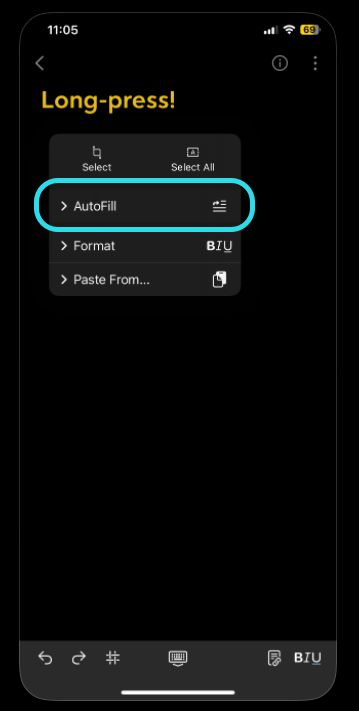
By long-pressing any text field, you can autofill data from Bitwarden and long as it's active as the keyboard auto-fill option:

Switch accounts during autofill
If you are logged in to more than one account, your mobile app will default to trying to autofill credentials from the currently active account. You can switch from one account to another during autofill by tapping the avatar bubble.
Using passkeys
Setup Bitwarden for use with passkeys
To use the functionality described below, open your iOS Settings app and navigate to Passwords → Password Options. Toggle the following options on:
Toggle AutoFill Passwords and Passkeys on.
Toggle Bitwarden on in the Use passwords and passkeys from: list.
Create a passkey
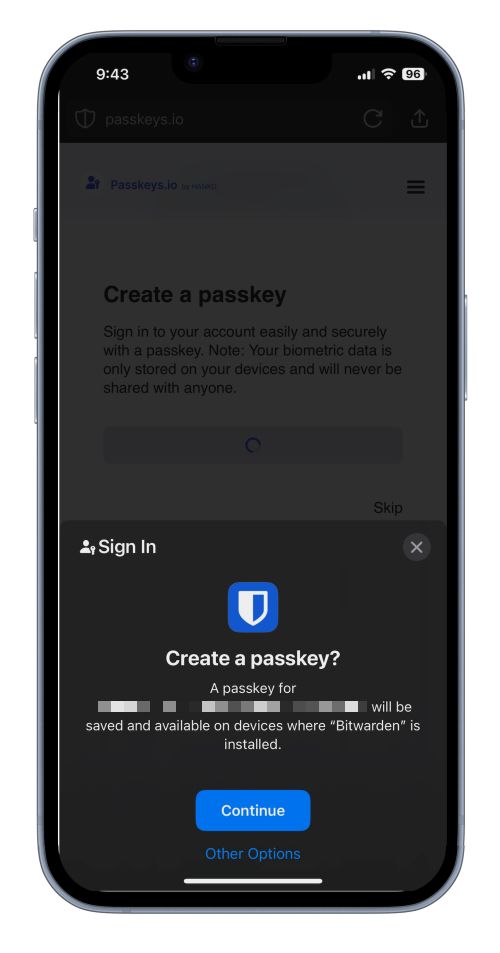
When creating a new passkey on a website or app, the iOS application will prompt you to store the passkey:

Select Continue.
note
Select Other Options if you do not wish to store the passkey in Bitwarden or Other Sign In Options to sign in with a passkey not stored in Bitwarden.
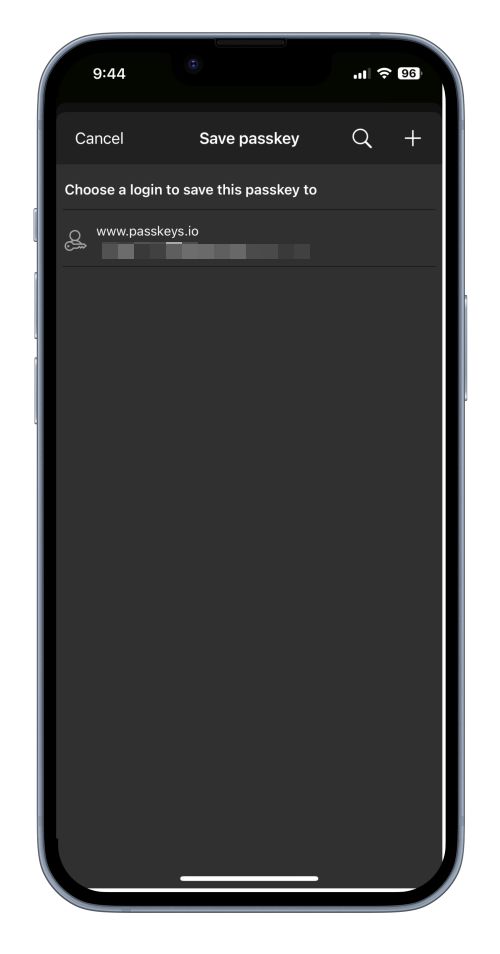
If a passkey already exists for this service, Bitwarden will allow you to save a new passkey by selecting the icon to create a new item, or by overwriting an existing passkey:

note
Only one passkey can be saved per login item. If a credential is saved in multiple places, for instance as two separate login items in the individual vault and organization vault respectively, a different passkey can be be stored with each login item.
Sign in using a passkey stored in Bitwarden
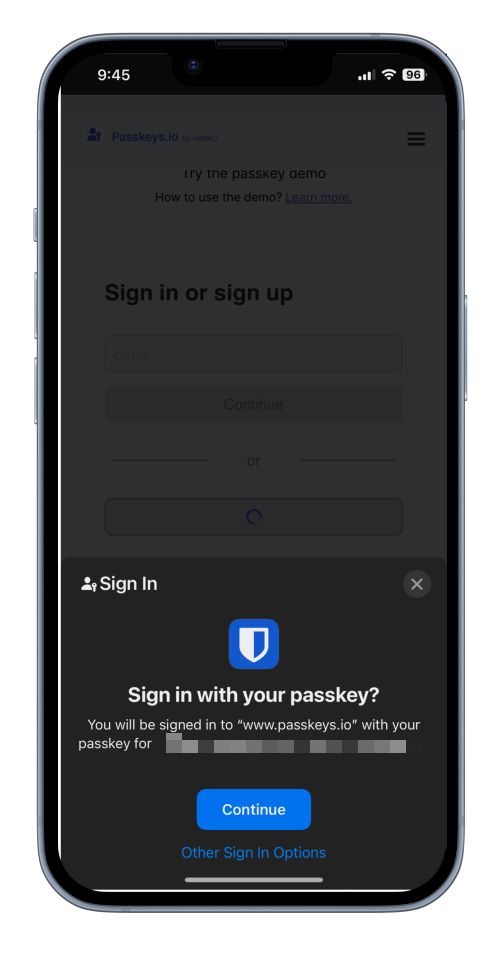
To use a passkey stored in Bitwarden, initiate the passkey login on the website. The mobile app will provide an option to login using the passkey stored in your Bitwarden vault:

Select Continue.
note
Select Other Options if you do not wish to store the passkey in Bitwarden or Other Sign In Options to sign in with a passkey not stored in Bitwarden.