License Organizations or Premium
Self-hosting Bitwarden is free, however some features must be unlocked in your self-hosted instance with a registered license file. A license file can be obtained from the Bitwarden-hosted web app by either an account with a premium individual subscription or by the owner of an organization.
The steps are different when working with an individual license versus an organization license.
note
The procedures in this article assume that you have already started a paid subscription to Bitwarden. If you haven't, refer to About Bitwarden Plans and What Plan is Right for Me?
Follow these procedures when working with an individual license for a premium subscription. You'll be working in both the cloud web vault and your self-hosted web vault, and your account email addresses should match.
After you create an account on your self-hosted server, retrieve your license from the cloud web app:
Log in and select Settings → Subscription from the navigation.
Select the Download license button:

Download personal license

Next, log in to your self-hosted Bitwarden server to apply the downloaded license:
If you haven't already, verify your email address. You will need to have configured SMTP-related environment variables to do so.
Select Settings → Subscription from the navigation.
In the License file section, select the Browse... or Choose file button button and add the downloaded license file.
Select the Submit button to apply your premium license.
If for any reason you need to update your individual license file, for example when it expires:
Follow the steps to Retrieve your license again.
Follow the steps to Apply your license again, only this time you will see an Update license button rather than a button to browse for a new license.
Follow these procedures when working with an organization license for a Families or Enterprise organization. You must be an organization owner to retrieve, apply, and update a license.
Before starting an organization on your self-hosted server, retrieve your organization license from the cloud web app.
In the Bitwarden web app, open the Admin Console using the product switcher:
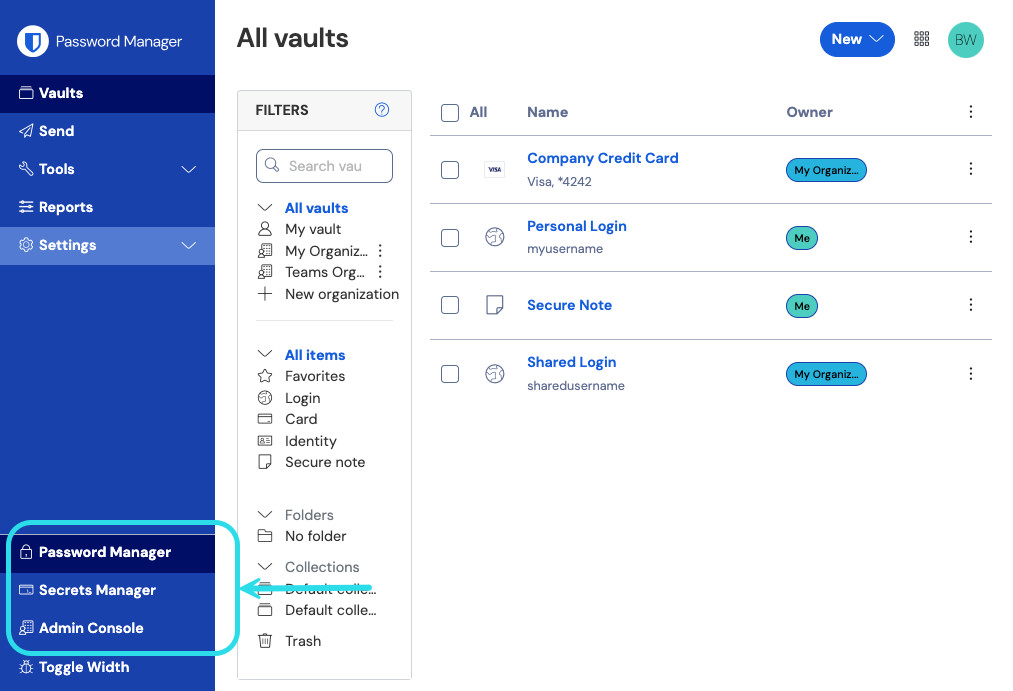
Product switcher Navigate to Billing → Subscription.
Scroll down and select the Download license button.
When prompted, enter the installation ID that was used to install your self-hosted server and select Submit. If you don't know the installation ID off-hand, you can retrieve it from
./bwdata/env/global.override.env.
note
Make sure that the installation ID you retrieved from bitwarden.com/host uses the same data region as where your organization exists.
Applying your license in a self-hosted server is the means by which you'll create a self-hosted organization. From your self-hosted web vault:
Start a new organization by selecting the Add organization button.
Select the Browse... or Choose file button, add the downloaded license file, and select Submit.
note
If you receive a version not supported error message, update your server and try uploading your license file again. To update your server, make a backup of the bwdata directory and follow these instructions.
Organizations will need to update the license file used by their self-hosted server in several different scenarios, for example:
To add user seats to a self-hosted organization. Self-hosted organizations' seat count is dictated by the license, so to add seats they must first be added to the associated cloud organization and then the license used by your self-hosted organization must be updated.
To continue operation of the self-hosted organization when the license renews. You have 60 days, from the date of renewal, to update the license file to you self-hosted server before your self-hosted organization is disabled.
There are two methods for updating a self-hosted organization's license, however Families organizations may only update manually:
Automatic sync:
Eliminates the need for organization admins to manually re-upload licenses. Once setup, admins will only need to trigger a sync from the Organization → Billing when an update to the license used by the self-hosted organization is required.
Makes Families sponsorships possible for members of self-hosted organizations. Sync for these sponsorships will automatically occur per day.
Cannot be setup by organizations still in a free trial period.
To set up automatic sync:
Step 1: Enable cloud communication
note
This step must be completed by someone with access to your self-hosted instance's configuration files.
Configure your server to allow communication with Bitwarden cloud systems by setting the following lines in bwdata/env/global.override.env:
BashglobalSettings__enableCloudCommunication=true globalSettings__baseServiceUri__cloudRegion=US
If your cloud organization was created on EU servers, you'll need make the following changes to configure for communication with EU cloud servers:
Change the second of these lines to
globalSettings__baseServiceUri__cloudRegion=EU.Set the following 3 additional values:
BashglobalSettings__installation__identityUri=https://identity.bitwarden.eu globalSettings__installation__apiUri=https://api.bitwarden.eu globalSettings__pushRelayBaseUri=https://push.bitwarden.eu
note
Make sure before proceeding that your configuration correctly correlates to the data region selected when retrieving your installation ID & key as described above.
Once you have set these value, apply your change by running the ./bitwarden.sh rebuild command. Start your server again with the ./bitwarden.sh start command.
note
Enabling automatic sync requires communication with Bitwarden's cloud systems. If your environment uses a firewall to block outbound traffic, you will need to allow https://api.bitwarden.com or .eu and https://identity.bitwarden.com or .eu.
Step 2: Retrieve billing sync token
Once cloud communication is enabled at the server-level, a sync token needs to be passed from the cloud organization that is associated with your self-hosted organization. To retrieve your sync token from the cloud web app:
Open the cloud Admin Console and navigate to Billing → Subscription.
In the self-hosting section, select Set up billing sync.
Enter your master password and select Generate token.
Copy the generated token.
Step 3: Apply billing sync token
To apply the billing sync token to your self-hosted organization:
Open the self-hosted Admin Console and navigate to Billing → Subscription.
In the License and billing management section, choose the Automatic sync option.
Select the Manage billing sync button.
Paste your generated Billing Sync Token and select Save.
note
Sync for Families for Enterprise will occur once daily once you've triggered your first sync. The Last sync field in this section will report Never until you trigger your first sync.
Sync for license updates must always be done manually by selecting the Sync license button (see the next section for details).
Step 4: Trigger sync
Trigger a sync once you've completed setup and each time you need to update your license. Sync for Familes for Enterprise will occur once daily. To trigger a sync:
Open the self-hosted Admin Console and navigate to Organization → Billing.
Select the Sync license button.
note
If you receive a version not supported error message, update your server and try uploading your license file again. To update your server, make a backup of the bwdata directory and follow these instructions.