Import Data from Password Safe
Use this article for help exporting data from Password Safe and importing into Bitwarden. Password Safe (V8) currently only supports exporting as .csv file. Older versions are also supported .xml.
To export data from the Password Safe desktop app:
Open Password Safe 8 and open the Extras menu from the upper left corner.
Locate the Export option on the left-hand side and then choose Passwords.
For the type please select
CSVand enter a path to save the exported file. Leave the encoding at UTF-8.
Export from Desktop App Click on the big gray arrow on the right to proceed to the export settings screen.
Set the separating character to Semicolon.
Set the text qualifier to
"(double quote).Check the checkbox to keep the column headers.

Export settings screen from Desktop App Click Finish to start the export.
warning
Please note that Password Safe will export a
.csvfor every category you have and not just a single.csv.
Currently, Bitwarden do not offer a specific importer for this type of file. To prepare the exported file for import, please follow these instructions.
Data must be imported to Bitwarden from the web vault or CLI. Data is encrypted locally before being sent to the server for storage.
To import data to your vault:
Log in to the web vault at https://vault.bitwarden.com, https://vault.bitwarden.eu, or
https://your.bitwarden.domain.comif self-hosting.Select Tools → Import data from the navigation:
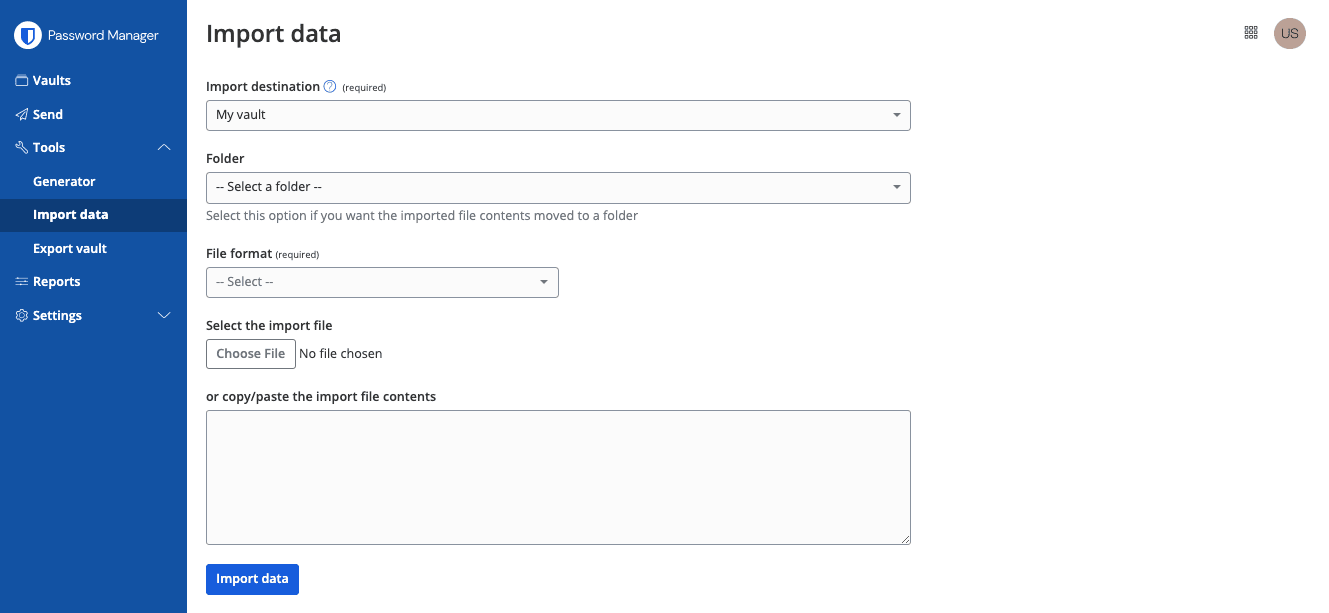
Import data Complete the following fields from the drop down menus:
Import destination: Select the import destination such as your individual vault or an organizational vault that you have access to.
Folder or Collection: Select if you would like the imported content moved to a specific folder or organization collection that you have access to.
File format: Select the import file format.
Select Choose File and add the file to import or copy/paste the contents of your file into the input box.
warning
Importing does not check whether items in the file to import already exist in your vault. If you import multiple files or import files with items already in your vault, this will create duplicates.
Select Import data to trigger the import. If you are importing a password protected
.jsonfile, enter the password into the Confirm vault import window that will appear.After successful import, delete the import source file from your computer. This will protect you in the event your computer is compromised.
Additional items such as file attachments, Sends, and trash will need to be manually uploaded to your vault.
To import data to your vault:
Select the Settings tab and choose the Import items option.
Complete the following fields from the drop down menus:
Import destination: Select the import destination such as your individual vault or an organizational vault that you have access to.
Folder or Collection: Select if you would like the imported content moved to a specific folder or organization collection that you have access to.
File format: Select the import file format.
Select Choose File and add the file to import or copy/paste the contents of your file into the input box.
warning
Importing does not check whether items in the file to import already exist in your vault. If you import multiple files or import files with items already in your vault, this will create duplicates.
Select Import Data to trigger the import. If you are importing a password protected
.jsonfile, enter the password into the Confirm Vault Import window that will appear.After successful import, delete the import source file from your computer. This will protect you in the event your computer is compromised.
To import data to your vault:
Select File > Import data.
Complete the following fields from the drop down menus:
Import destination: Select the import destination such as your individual vault or an organizational vault that you have access to.
Folder or Collection: Select if you would like the imported content moved to a specific folder or organization collection that you have access to.
File format: Select the import file format.
Select Choose File and add the file to import or copy/paste the contents of your file into the input box.
warning
Importing does not check whether items in the file to import already exist in your vault. If you import multiple files or import files with items already in your vault, this will create duplicates.
Select Import Data to trigger the import. If you are importing a password protected
.jsonfile, enter the password into the Confirm Vault Import window that will appear.After successful import, delete the import source file from your computer. This will protect you in the event your computer is compromised.
To import data to your vault from the CLI, use the following command:
Bashbw import <format> <path>bw import requires a format (use bw import --formats to retrieve a list of formats) and a path, for example:
Bashbw import <format> /Users/myaccount/Documents/mydata.csvAfter successful import, delete the import source file from your computer. This will protect you in the event your computer is compromised.
Imports may be rejected for exceeding any of the following data limitations:
If your import has more than 7,000 items.
If your import has more than 2,000 folders.
If your import has more than 2,000 collections.
If your import has more than 7,000 item-folder relationships (e.g. a single item in 3 folders can be said to have 3 item-folder relationships).
If your import has more than 14,000 item-collection relationships (e.g. a single item in 3 collections can be said to have 3 item-collection relationships).