Organizations Quick Start
Password managers such as Bitwarden make it easy to store and access unique and secure passwords across all of your devices, keeping your online accounts safer than ever! Using Bitwarden, you won't need to dangerously repeat simple passwords or leave them exposed in unencrypted formats such as spreadsheets, documents, or sticky notes.
Bitwarden organizations will add a layer of collaboration and sharing to password management for your family, team, or enterprise, allowing you to securely share common information such as office wifi passwords, online credentials, or shared company credit cards. Secure sharing of organization-owned credentials is safe and easy.
This article will help you get started with a free two-person organization so you can experience secure sharing in no time.
Bitwarden organizations relate users and vault items together for secure sharing of logins, notes, cards, and identities owned by the organization. Organizations could be a family, team, company or any group of people that requires secure shared data. Organizations have a unique view, the Admin Console, where administrators can manage the organization's items and users, run reports, and configure organization settings:

Unless an organization you're a member of uses policies to restrict you to membership in a single organization, you can be a member of as many as you'd like.
Comparing organizations with premium
The key feature to know is that organizations enables secure sharing from organizations to users. Premium individual accounts unlock premium password security and management features, including advanced two-factor authentication (2FA) options, the Bitwarden Authenticator (TOTP), encrypted file attachments, and more, but Premium doesn't include secure data sharing itself. However, every Bitwarden account comes with the option to launch a free two-person organization for secure sharing.
Paid organizations (Families, Teams, or Enterprise) automatically include these premium features (advanced 2FA options, Bitwarden Authenticator (TOTP), and more) for every user enrolled in the organization.
Free Bitwarden organizations allow for two users to securely share organization-owned credentials. You might use a free organization to share with friend or partner, or to test organizations before upgrading to a different plan.
Bitwarden provides applications on a variety of devices, including browser extensions, mobile apps, desktop apps, and a CLI, but for the purposes of this guide we'll focus on the web app. The web app provides the richest Bitwarden experience for administering your organization.
Create a Bitwarden account, and make sure that you pick a strong and memorable master password. We even recommend writing down your master password and storing it in a safe location.
tip
Don't forget your Master Password! Bitwarden is a zero-knowledge encryption solution, meaning that the team at Bitwarden, as well as Bitwarden systems themselves, have no knowledge of, way to retrieve, or way to reset your master password.
Once your account is created, log in to the web app and verify your account's email address to unlock access to all features:

In order to use your free two-person organization for secure sharing, you'll need to have two Bitwarden accounts. Once your first Bitwarden account is setup, follow the same procedure (or help your friend or partner to do so) to setup the other account.
tip
Bitwarden organizations have a deep level of member-level permissions customization. Whichever member you proceed to setup your organization with will be the Owner.
To setup your organization:
In the Bitwarden web app, select the New organization button:

New organization Enter an Organization name and a Billing email we can reach you at. In this guide we are setting up a free organization, so you won't be billed for anything!
Choose your plan. Bitwarden offers organizations suited to any need, but in this case select Free.
Scroll down and select Submit to finish creating your organization.

Once created, you'll land in the Admin Console, which is the central hub for all things sharing and organization administration. As the organization owner, you'll be able to see your Vault items and collections, to manage Members, run Reports, change Billing settings, and configure other organization Settings:
Users with access to the Admin Console can get to it from any time in the web app using the left-hand navigation:
Collections are an important part of a Bitwarden organization, they represent the logical grouping of organization-owned vault items that belong to your organization. Your organization comes pre-loaded with a Default Collection and an Unassigned tag. With a free organization, you can create up to two collections from the Vaults view or from the Admin Console:

tip
In a lot of ways, collections are like the folders you might use to organize your individual vault. A key difference is that items that belong to your organization must be included in at least one collection.
Now that you are familiar with your organization, it's a good time to add the other organization member you'll be sharing with. To ensure the security of your organization, Bitwarden applies a three-step process for onboarding a new member, Invite → Accept → Confirm.
As the organization owner, invite a new member:
In the Admin Console, select Members from the navigation and use the Invite member button:

Invite member to an organization In the Role tab, enter the Email of your second member, which should match the email they signed up for Bitwarden with. Then, select a Member role. In many cases, it's a good idea to add a second user with the Owner role to the organization.
In the Collections tab, select which collections to allow this user access to, as well as what the level of permission for each to give them.
Select Save to send the invitation to the designated email address.

Once your invitation is sent, inform your new member and help them accept the invitation.
As the newly invited member, open your email inbox and look for an email from Bitwarden inviting you to join an organization. Clicking the link in the email will open an invitation window:

Since you have already signed up for Bitwarden, simply log in. Fully logging in to Bitwarden will accept the invitation.
note
Invitations expire after five days. Make sure you accept the invitation within that window, otherwise the organization Owner will have to re-invite you.
Confirming accepted members to your organization is the last step to grant members access to shared items. To complete the loop:
In the Admin Console, select Members from the navigation.
Select any
Acceptedusers and use the Options menu to Confirm selected:
Confirm member to an organization Verify that the fingerprint phrase on your screen matches the one your new member can find in Settings → My account:

Fingerprint phrase


Each fingerprint phrase is unique to its account, and ensures a final layer of oversight in securely adding users. If they match, select Submit.
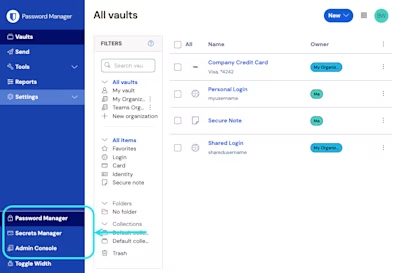
Part of the magic of Bitwarden organizations is that items that belong to you and items that belong to the organization are accessible side-by-side from your Vaults view. You can filter between your individual items (My vault) and organization items (My Organization):

You might not have a item shared from an organization yet, but when you do it will be displayed in your vault with a card indicating where the item is from:

Shared items are owned by the organization. This means that anyone with permission can alter the item or delete it, which would remove it from your vault as well.
The last step on the road to secure sharing is to create an item and move it to the organization so it can be shared. An existing vault item can be moved to the organization after it's created, but for this guide, we'll focus on creating a new login from your individual vault:
On the Vaults page, select the New button and select Login.
Fill in all the relevant information for your new login item (for example, username and password). The item can be anything you want both yourself and the other organization user to have access to, for example a family streaming account.
In the Ownership section at the top of the Add item panel, select your organization to designate the item for sharing.
Select one or more collections to put this item into. Generally, users of two-person organizations setup access for both users for all collections. In larger or more complex organizations, which collection you put the item into will determine who can access it.
Select the Save button to finishing creating the organization-owned item.
This new item will be accessible to both yourself and the other organization user! As long as both users can access the collection it's in, it will appear for both in the organization vault and in the All vaults view alongside other vault items.
If you have shared an item with an organization, there are two options to unshare the item with the organization.
Clone the item back to your individual vault by using the product switcher to open the Admin Console and selecting Clone from the Options menu for the item you want to clone. Only users with user type admin or higher can clone items into their individual vault by changing the Ownership setting.
Delete the item from the organization vault by selecting Delete from the same menu.
Alternatively, you can unshare items by moving them to a different collection with higher access control restrictions.
You have setup your new Bitwarden accounts, created an organization, learned a bit about your vaults, and shared an item! Nice work! If you want to upgrade to a paid organization to unlock lots of additional features, navigate to your organization's Billing → Subscription view and select the Upgrade plan button:
