Share Items
Bitwarden provides two methods for sharing a vault item: add it to an organization collection to give members ongoing access, or create a link that gives anyone temporary access to a copy of the item's contents. This article covers both methods so you can choose which option will best meet the recipient's needs.
Share with organization collections
Sharing with a collection gives members of an organization ongoing access to an item through shared permissions.
Share via link
Share via link creates a Send containing a copy of a vault item. Recipients can view the copy until the link expires, but they can't access or change the original item. Share via link is available on the browser extension, desktop app, and web app.
Sharing using collections requires membership in an organization. Using Bitwarden, sharing an item means two things:
Adding the item to an organization. This transfers ownership of the item to the organization you're sharing it with.
Adding the item to one or more collections. The Access settings set on those collections determine who will have access to it.
Sharing with collections requires organization membership.
Whether you're Adding items to your organization or Importing items to your organization, you can specify who they should be shared with right from the start. You can add or import items to any collection that you have the right permissions for:
To add a new shared item from the web app, browser extension, mobile, or desktop:
On the Vault view of any Bitwarden app, select the Add button and select the desired item type.
tipOrganization owners, admins, and some custom users can also take this step directly from the Admin Console to skip some of the steps in this process.
Using the Owner dropdown, choose the organization you want this item to be owned by.
Using the Collections dropdown, choose the collection(s) to share this item with. The Access settings set on those collections determine who will have access to it.
Fill in the rest of the relevant information for the item and select Save to complete sharing.
Reminder: Sharing an item involves giving ownership of it to the organization. Permissions for a collection should be well managed by the administrative team because members with the right level of permission have the ability to alter or delete a shared item. You can tell that an item is owned by the organization by the badge next to its name:

You might find that an item currently owned by you needs to be shared with other members of your organization. Items can be shared with any collection that you have the right permissions for, from any Bitwarden app:
The most universal method for sharing existing items using the web app can be used to share items that will be brand new to your organization, or to simply add more collections to the list it's shared with:
In the Vaults view, select the item(s) to share using the checkbox(es).
tipOrganization owners, admins, and some custom users can also take this step directly from the Admin Console to skip some of the steps in this process.
Using the action bar, select Assign to collections:
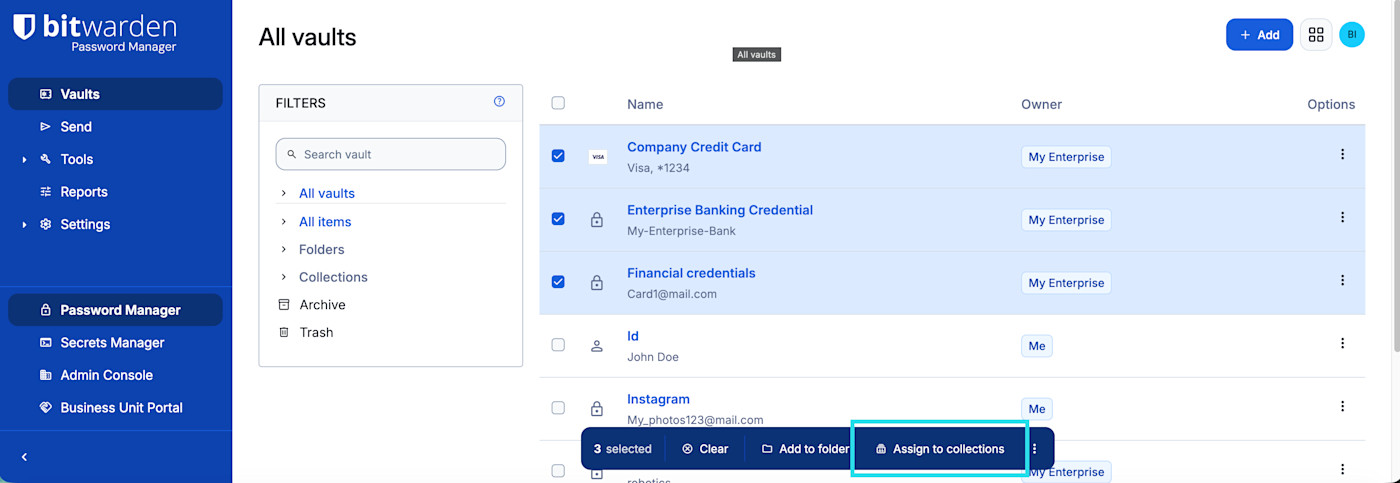
Assign to collections On the Assign to collections pop-up:
Use the Move to organization dropdown to choose the organization you want this item to be owned by.
Use the Select collections to assign dropdown to choose the collection(s) to share this item with. The Access settings set on those collections determine who will have access to it.
Select Assign to complete sharing.

More methods for sharing
The previously described method is the most universal and simplified, however there are a few other methods for sharing you may have access to:
Share from the Admin Console: As mentioned previously, organization owners, admins, and some custom users can streamline sharing by doing so directly from the Admin Console:
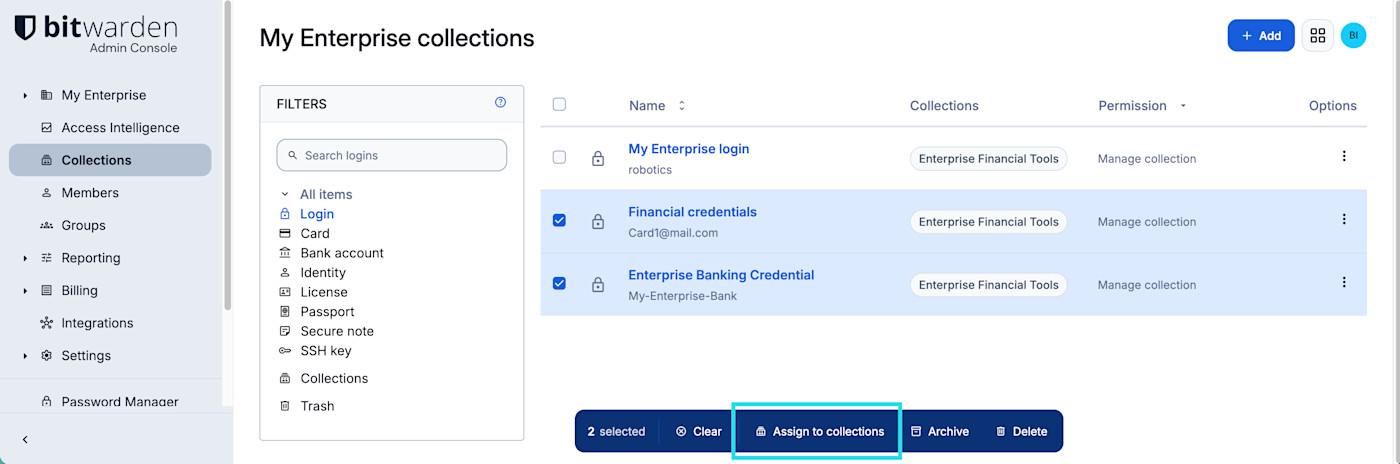
Assegna a raccolte in blocco Edit an item directly: If you need to make changes to an individual item prior to sharing it, open the item and, in the Edit view, use the Owner and Collections dropdowns to choose who to share it with while you're making the necessary changes:
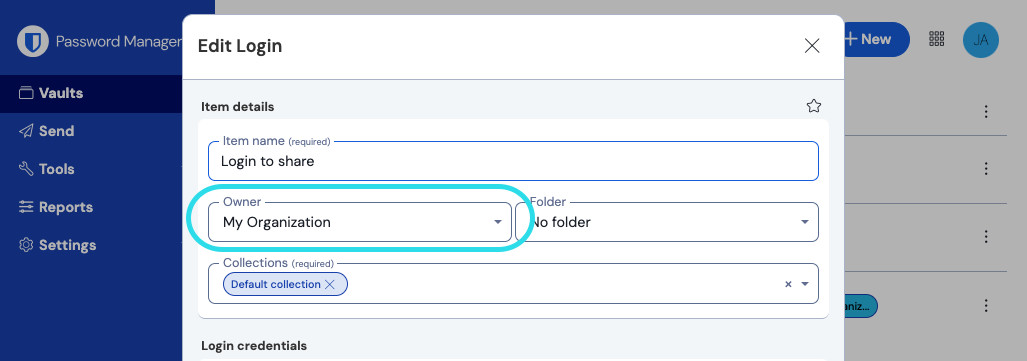
Change item ownership


Reminder: Sharing an item involves giving ownership of it to the organization. Permissions for a collection should be well managed by the administrative team because members with the right level of permission have the ability to alter or delete a shared item. You can tell that an item is owned by the organization by the badge next to its name:
Users with the Manage collection permission for the collection(s) an item is stored in can choose to stop sharing an item with an organization:
Clone the item by using the options menu for the item and selecting Clone.
On the Add item panel, use the Owner dropdown to select your account email. This will ensure the item is cloned into a non-shared context.
Save the cloned item.
Delete the original item by using the options menu for the item and selecting Delete.
Note that in some cases moving the item to a collection with higher access control restrictions, or to a collection that only you have access to, can be more effective than outright removing it from the organization.
Use Share via link to give someone temporary access to a copy of a vault item, while the original item remains in your vault. Share via link creates a Send containing the item's contents, which you can share through any channel. Share via link is available for premium users or members of a paid organization (Families, Teams, or Enterprise). Additionally, organization admins can configure access to this feature using the Manage Send and share policy.
Share via link is not available for SSH key items or for items in your archive or trash. To share an archived or deleted item, unarchive it or restore it from the trash first. To share an item in one or more collections, you need edit permission for at least one of them.
To share a vault item with one or more people who do not need ongoing access to an organization collection:
Select the menu for the item you wish to share, and then choose Share via link:
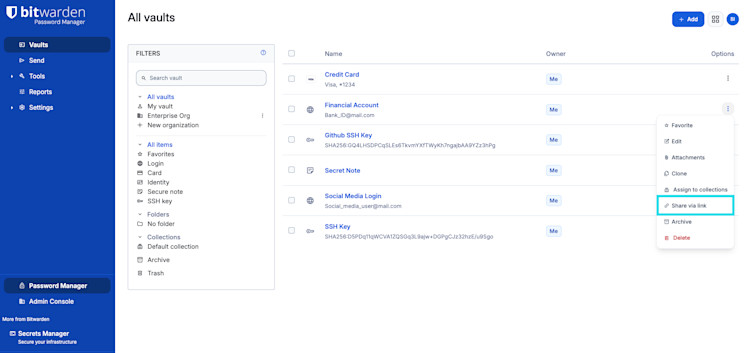
Share with link Enter the recipient's email address. Use commas to separate emails if sending to more than one recipient:
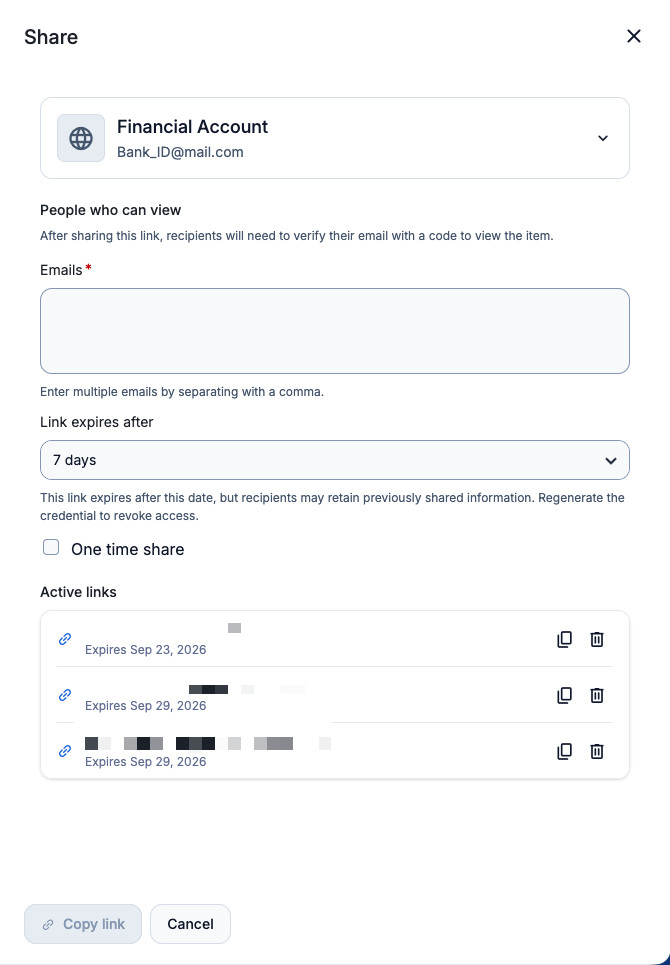
Share with link menu Configure the share rules:
Link expires after: Choose how long the link stays valid.
noteThe expiration date only affects the share link itself. If the recipient saved the shared vault item while the link was valid, they will still have it after the link expires.
One time share: Allow the link to be opened only once.
Once you are ready to share the link, select Copy link and paste it into your preferred channel of communication. Previously generated links will appear in the Active links list.


After you create a link, you can edit it to change its settings or add options:
Navigate to the Send page and select the shared vault item:
Select Edit.
When editing a vault item share, you may configure additional settings for the share link:
Maximum access count: Configure the number of times the link can be accessed.
Hide my email address from recipients: Selecting this option will hide the sender's email address when the recipient opens the share link.
Private note: Add any additional private notes to the Send.
Share via link sends a copy of the item as it existed when the link was created. Later edits to the original won't update the recipient's copy.
When you receive a shared item link:
Open the link, enter your email, and select Send code. Your email must match one the sender entered in order to receive a code.
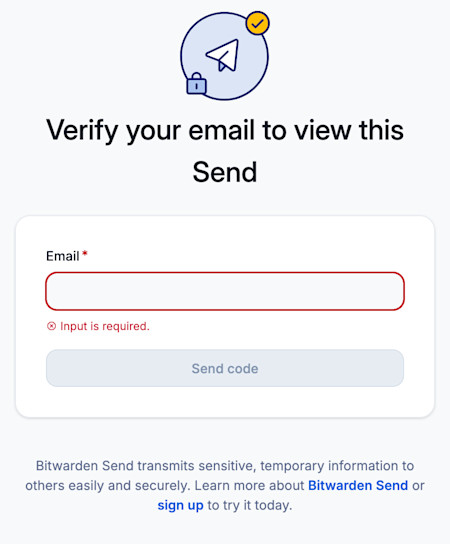
Enter email to verify After you receive the code, enter it into the Verification code field.
After your code is verified, you can copy the item's contents to use, or paste them into a new item in your vault for long-term storage.
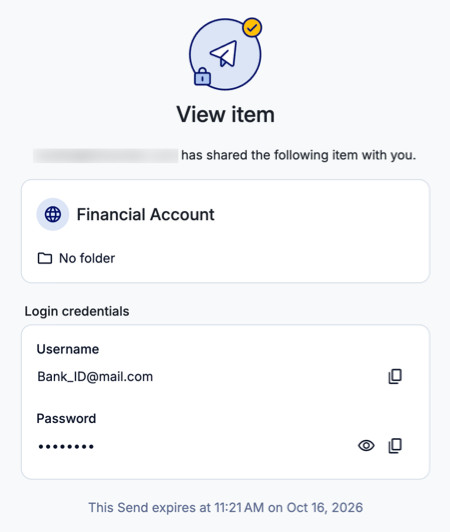
Share with link content

