Import from Keeper
Quickly transfer data from Keeper Password Manager to Bitwarden using one of two methods:
Using a Bitwarden browser extension or desktop app, import data directly without needing to download a file.
Using any Bitwarden app, download an export from your Keeper account and import it into Bitwarden.
To import Keeper data directly to Bitwarden, without needing to download an export file and transfer data manually:
In the Bitwarden desktop app or browser extension, open the Import page:
On desktop apps, select Import from the navigation.
On browser extensions, navigate to Settings > Vault options > Import.
Choose the Vault you want to import to and, optionally, a Folder or Collection to add imported data to.
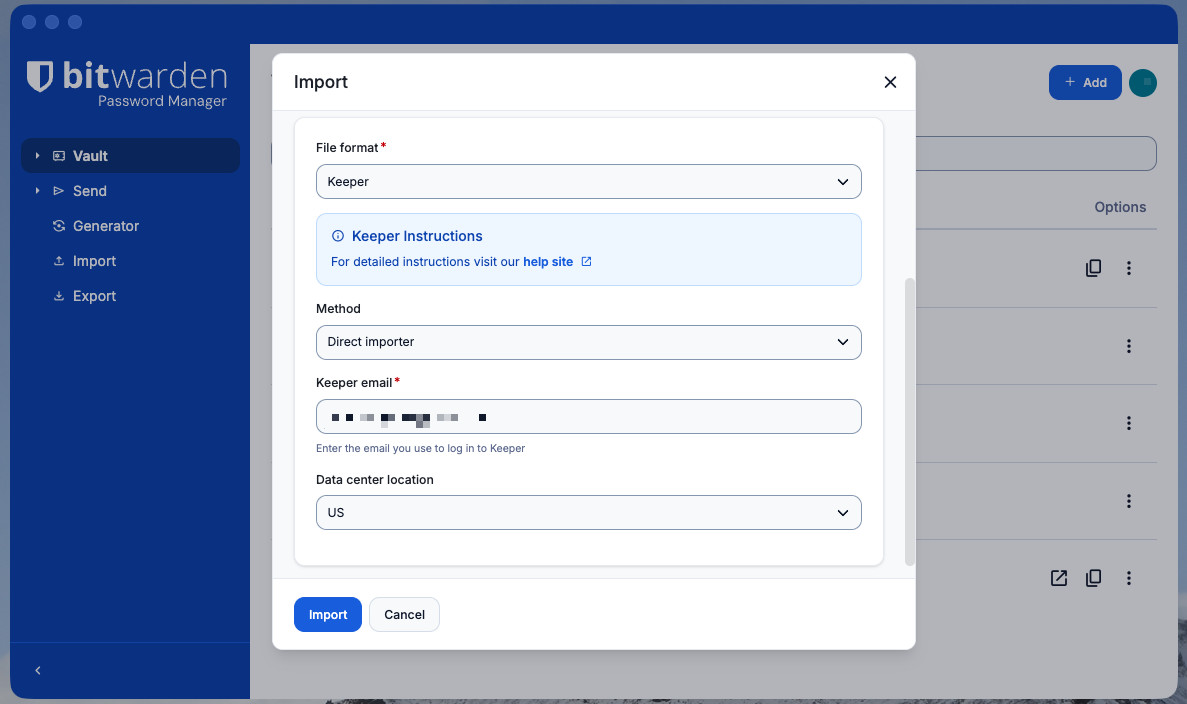
Import directly from Keeper From the File format dropdown, select Keeper.
From the Method dropdown, select Direct importer.
Enter your Keeper email and Data center location.
tipYour Data center location correlates to the region you select when you log in to Keeper. It can also be found in the URL of your Keeper vault when logged in on the web (for example,
keepersecurity.comis US,keepersecurity.euis EU, and so on).Select Import and, when prompted, complete your required authentication steps for Keeper. This requires your Master Password or SSO and some form of Device Approval. Here are two examples of what this will look like:
As a personal user of Keeper, you would typically:
Select a Device approval method to use. For personal users this can be:
An Email sent to the inbox attached to your Keeper account.
A Keeper Push notification that you can approve from the Keeper web app.
A Two-factor method you're using for your Keeper account.
noteBitwarden currently supports the Keeper Text Message, Authenticator App, and Keeper DNA options for two-factor authentication.
Enter your Keeper Master Password.

To export data from the Keeper web app:
Select your account email in the top corner of the web app and select Settings from the dropdown:
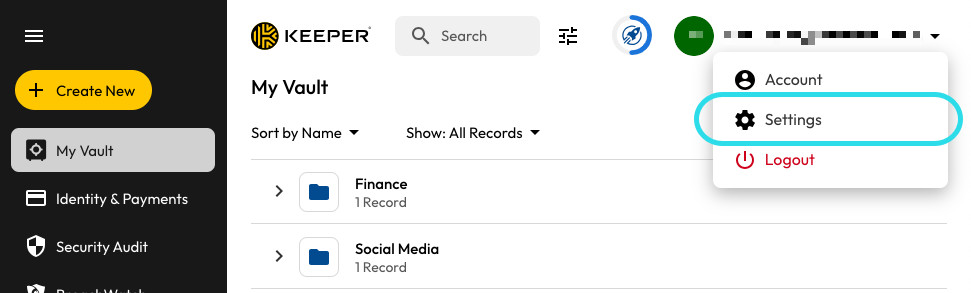
Export from Keeper Select Export from the pop-up window.
Choose the CSV or JSON export file type.
Select Export.
Enter your Keeper Master Password.
Select Export Now.

Data can be imported to Bitwarden from the web app, browser extension, desktop app, and CLI. Data is encrypted locally before being sent to the server for storage.
While some item types cannot be imported, you can still add them to a vault:
Upload file attachments to the new vault individually.
Re-create Sends in the new vault.
あなたの保管庫にデータをインポートするには:
https://vault.bitwarden.com、https://vault.bitwarden.eu、または自己ホスト型の場合は
https://your.bitwarden.domain.comにあるウェブ保管庫にログインしてください。ナビゲーションからツール → データをインポートを選択します。
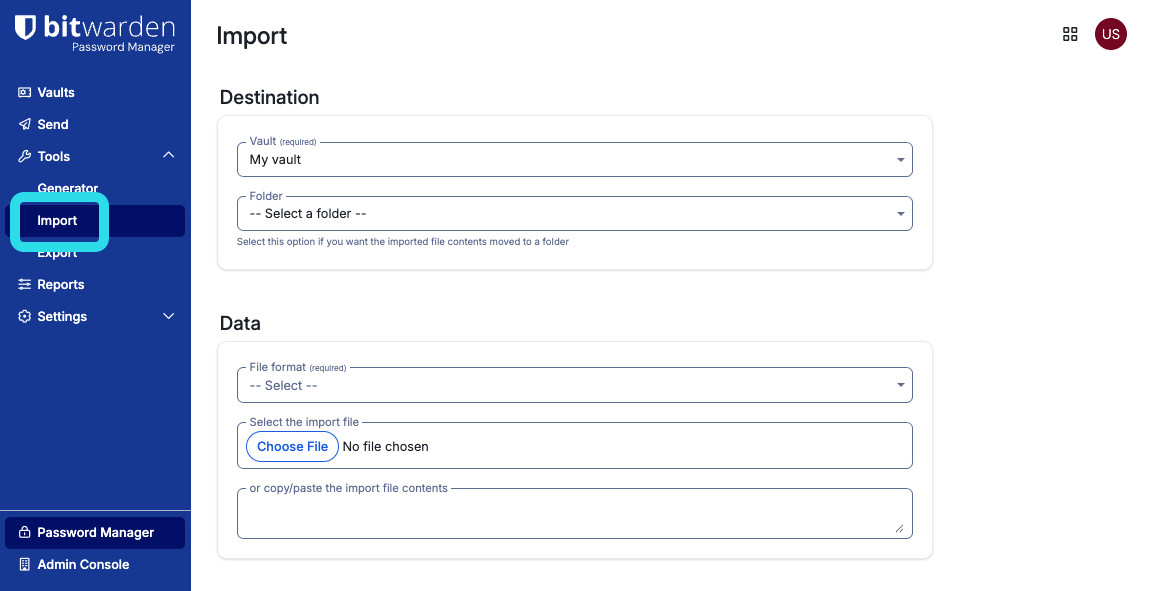
Import items 申し訳ありませんが、あなたの指示が不明確です。具体的なフィールドやドロップダウンメニューの選択肢を提供していただけますか?
インポート先: アクセス可能な個人の保管庫や組織の保管庫など、インポート先を選択してください。
フォルダーまたはコレクション: インポートされたコンテンツを特定のフォルダーまたはアクセス可能な組甔のコレクションに移動させたい場合は、選択してください。
ファイル形式:インポートファイル形式を選択します。
ファイルを選択し、インポートするファイルを追加するか、または ファイルの内容を入力ボックスにコピー/ペーストしてください。
warningインポートすると、インポートするファイル内のアイテムがすでにあなたの保管庫に存在するかどうかは確認されません。複数のファイルをインポートするか、またはすでに保管庫にアイテムがあるファイルをインポートすると、これにより重複が作成されます。
データをインポートを選択して、インポートをトリガーします。パスワードで保護された
.jsonファイルをインポートする場合は、表示される保管庫のインポートを確認ウィンドウにパスワードを入力してください。インポートが成功した後、コンピュータからインポート元のファイルを削除してください。これは、あなたのコンピュータが侵害された場合に保護します。

If an “Import error” message appears, no data was added to your vault. Fix the import file issue and try again.