Ping Identity SAML Implementation
This article contains Ping Identity-specific help for configuring login with SSO via SAML 2.0. For help configuring login with SSO for another IdP, refer to SAML 2.0 Configuration.
Configuration involves working simultaneously with the Bitwarden web app and the Ping Identity Administrator Portal. As you proceed, we recommend having both readily available and completing steps in the order they are documented.
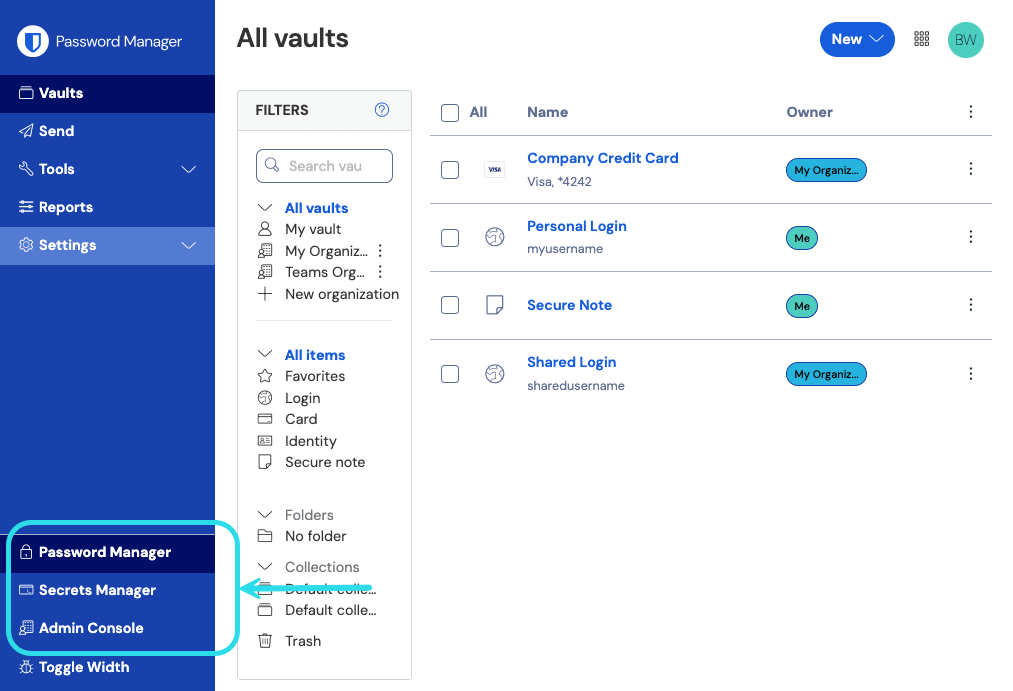
Log in to the Bitwarden web app and open the Admin Console using the product switcher:
Open your organization's Settings → Single sign-on screen:
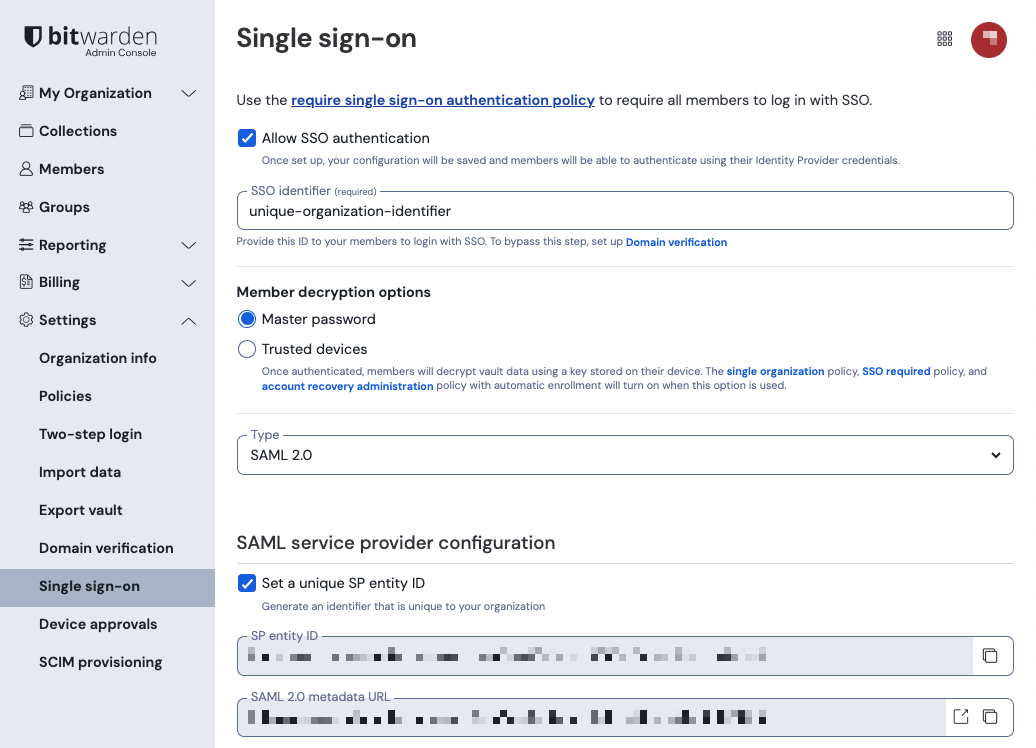
If you haven't already, create a unique SSO identifier for your organization and select SAML from the the Type dropdown. Keep this screen open for easy reference.
You can turn off the Set a unique SP entity ID option at this stage if you wish. Doing so will remove your organization ID from your SP entity ID value, however in almost all cases it is recommended to leave this option on.
tip
代替のメンバー復号化オプションがあります。信頼できるデバイスでのSSOの使い方またはキーコネクターの使い方を学びましょう。
In the Ping Identity Administrator Portal, select Applications and the Icon at the top of the screen to open the Add Application screen:
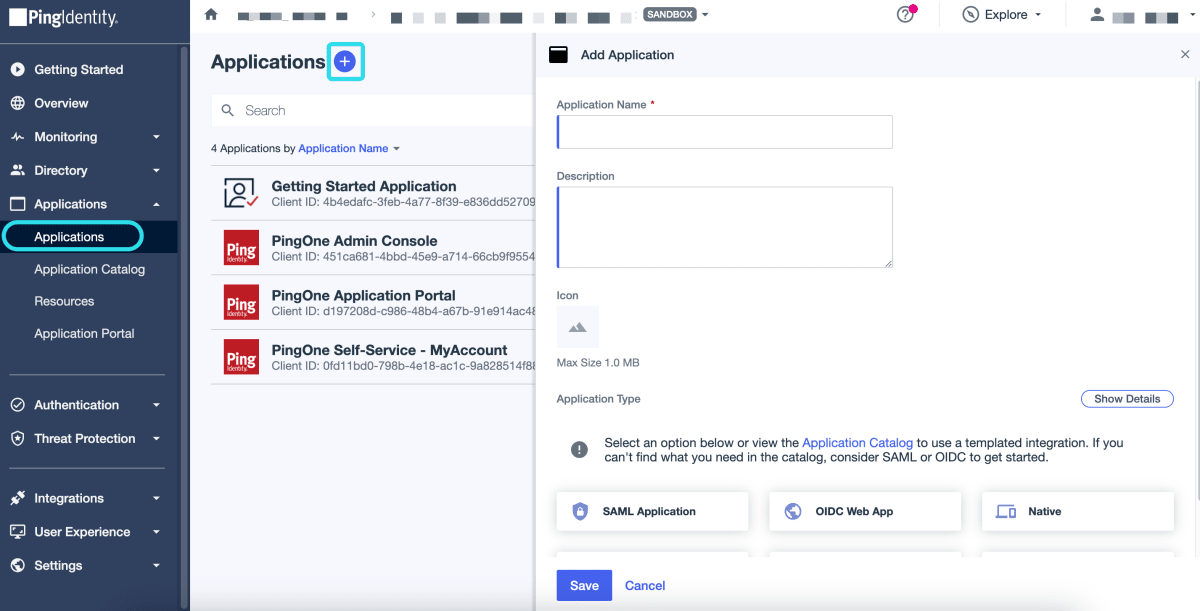
Enter a Bitwarden Specific name in the Application Name field. Optionally add desired description details as needed.
Select the SAML Application option and then Configure once you have finished.
On the SAML Configuration screen select Manually Enter. Using the information on the Bitwarden single sign-on screen, configure the following fields::
Field | Description |
|---|---|
ACS URL | Set this field to the pre-generated Assertion Consumer Service (ACS) URL. This automatically-generated value can be copied from the organization's Settings → Single sign-on screen and will vary based on your setup. |
Entity ID | Set this field to the pre-generated SP Entity ID. This automatically-generated value can be copied from the organization's Settings → Single sign-on screen and will vary based on your setup. |
Select Save to continue.
At this point, you have configured everything you need within the context of the Ping Identity Administrator Portal. Return to the Bitwarden web app to complete configuration.
The Single sign-on screen separates configuration into two sections:
SAML service provider configuration will determine the format of SAML requests.
SAML identity provider configuration will determine the format to expect for SAML responses.
Configure the following fields according to the information provided in the Ping Identity app Configuration screen:
Field | Description |
|---|---|
Name ID Format | Set this field to the Subject Name ID Format specified in the Ping Identity app configuration. |
Outbound Signing Algorithm | The algorithm Bitwarden will use to sign SAML requests. |
Signing Behavior | Whether/when SAML requests will be signed. |
Minimum Incoming Signing Algorithm | By default, Ping Identity will sign with RSA SHA-256. Select |
Expect signed assertions | Whether Bitwarden expects SAML assertions to be signed. This setting should be unchecked. |
Validate Certificates | Check this box when using trusted and valid certificates from your IdP through a trusted CA. Self-signed certificates may fail unless proper trust chains are configured with the Bitwarden Login with SSO docker image. |
When you are done with the service provider configuration, Save your work.
Identity provider configuration will often require you to refer back to the Ping Identity Configuration screen to retrieve application values:
Field | Description |
|---|---|
Entity ID | Set this field to the Ping Identity application's Entity ID, retrieved from the Ping Identity Configuration screen. |
Binding Type | Set to HTTP POST or Redirect. |
Single Sign On Service URL | Set this field to the Ping Identity application's Single Sign-on Service url, retrieved from the Ping Identity Configuration screen. |
Single Log Out URL | Login with SSO currently does not support SLO. This option is planned for future development, however you may pre-configure it if you wish. |
X509 Public Certificate | Paste the signing certificate retrieved from the application screen. Navigate to the Configuration tab and Download Signing Certificate.
and
|
Outbound Signing Algorithm | By default, Ping Identity will sign with RSA SHA-256. Select |
Disable Outbound Logout Requests | Login with SSO currently does not support SLO. This option is planned for future development. |
Want Authentication Requests Signed | Whether Ping Identity expects SAML requests to be signed. |
note
X509証明書を完成させるとき、有効期限の日付をメモしてください。SSOエンドユーザーへのサービスの中断を防ぐために、証明書を更新する必要があります。証明書が期限切れになった場合でも、管理者と所有者のアカウントは常にメールアドレスとマスターパスワードでログインできます。
When you are done with the identity provider configuration, Save your work.
tip
シングルサインオン認証ポリシーを有効にすることで、ユーザーにSSOでログインすることを要求することができます。メモしてください、これは単一の組織ポリシーも同時に活性化する必要があります。もっと学ぶ
Once your configuration is complete, test it by navigating to https://vault.bitwarden.com, entering your email address, selecting Continue, and selecting the Enterprise single sign-on button:
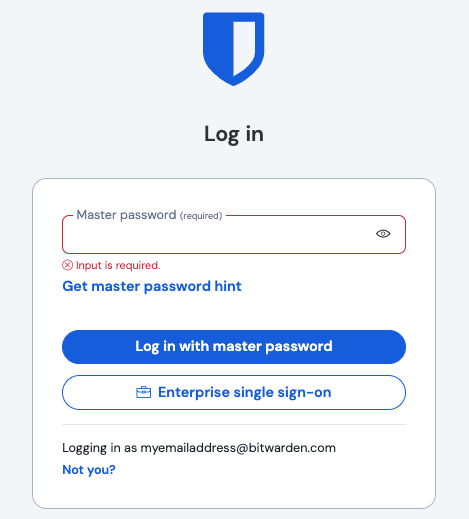
Enter the configured organization identifier and select Log in. If your implementation is successfully configured, you will be redirected to the Ping Identity login screen:
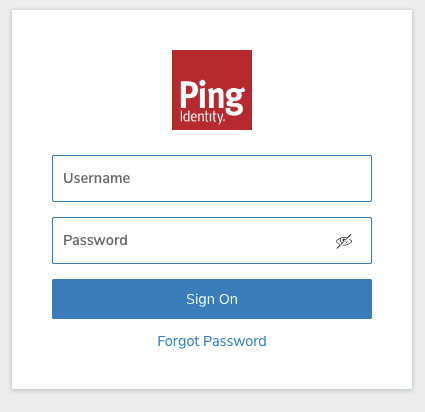
After you authenticate with your Ping Identity credentials, enter your Bitwarden master password to decrypt your vault!
note
Bitwardenは勝手なレスポンスをサポートしていませんので、あなたのIdPからログインを開始するとエラーが発生します。SSOログインフローはBitwardenから開始されなければなりません。
Educate your organization members on how to use login with SSO.
このページの変更を提案する
どうすればこのページを改善できますか?
技術、請求、製品に関するご質問は、サポートまでお問い合わせください。