Licensbetalda funktioner
Self-hosting Bitwarden is free, however some features must be unlocked in your self-hosted instance with a registered license file. A license file can be obtained from the Bitwarden-hosted web app by either an account with a premium individual subscription or by the owner of an organization.
The steps are different when working with an individual license versus an organization license.
note
The procedures in this article assume that you have already started a paid subscription to Bitwarden. If you haven't, refer to About Bitwarden Plans and What Plan is Right for Me?
Individual license
Follow these procedures when working with an individual license for a premium subscription. You'll be working in both the cloud web vault and your self-hosted web vault, and your account email addresses should match.
Retrieve individual license
After you create an account on your self-hosted server, retrieve your license from the cloud web app:
Log in and select Settings → Subscription from the navigation.
Select the Download license button:

Download personal license

Apply individual license
Next, log in to your self-hosted Bitwarden server to apply the downloaded license:
If you haven't already, verify your email address. You will need to have configured SMTP-related environment variables to do so.
Select Settings → Subscription from the navigation.
In the License file section, select the Browse... or Choose file button button and add the downloaded license file.
Select the Submit button to apply your premium license.
Update individual license
If for any reason you need to update your individual license file, for example when it expires:
Follow the steps to Retrieve your license again.
Follow the steps to Apply your license again, only this time you will see an Update license button rather than a button to browse for a new license.
Organization license
Follow these procedures when working with an organization license for a Families or Enterprise organization. You must be an organization owner to retrieve, apply, and update a license.
Retrieve organization license
Before starting an organization on your self-hosted server, retrieve your organization license from the cloud web app.
In the Bitwarden web app, open the Admin Console using the product switcher:
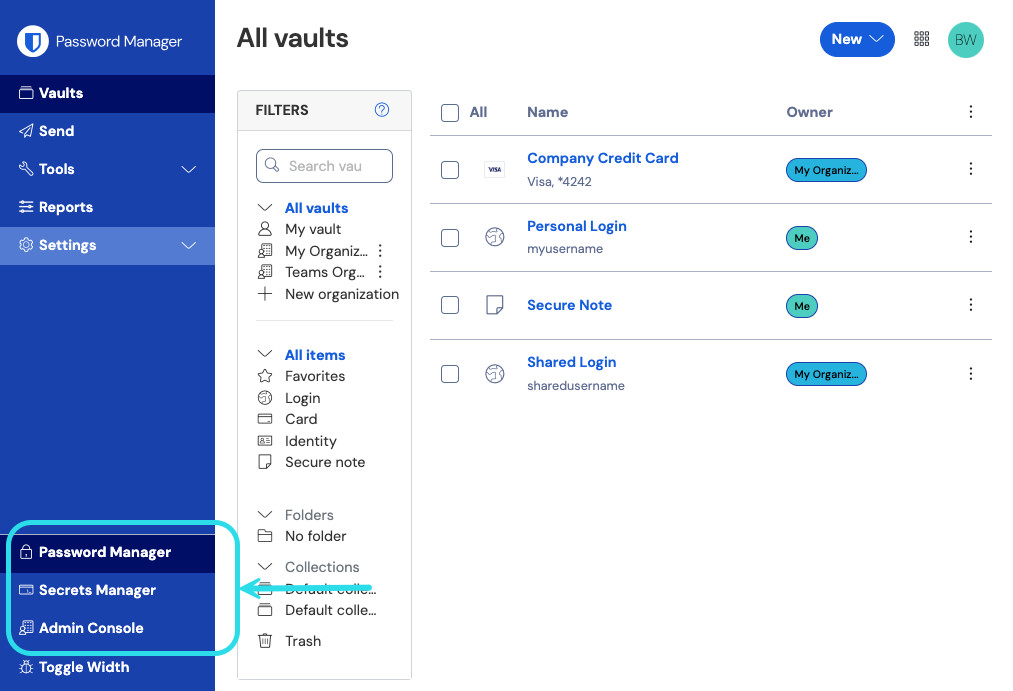
Product switcher Navigate to Billing → Subscription.
Scroll down and select the Download license button.
When prompted, enter the installation ID that was used to install your self-hosted server and select Submit. If you don't know the installation ID off-hand, you can retrieve it from
./bwdata/env/global.override.env.
note
Make sure that the installation ID you retrieved from bitwarden.com/host uses the same data region as where your organization exists.
Apply organization license
Applying your license in a self-hosted server is the means by which you'll create a self-hosted organization. From your self-hosted web vault:
Start a new organization by selecting the Add organization button.
Select the Browse... or Choose file button, add the downloaded license file, and select Submit.
note
Om du får ett felmeddelande om version som inte stöds, uppdatera din server och försök ladda upp din licensfil igen. För att uppdatera din server, gör en säkerhetskopia av bwdata-katalogen och följ dessa instruktioner.
Update organization license
Organizations will need to update the license file used by their self-hosted server in several different scenarios, for example:
To add user seats to a self-hosted organization. Self-hosted organizations' seat count is dictated by the license, so to add seats they must first be added to the associated cloud organization and then the license used by your self-hosted organization must be updated.
To continue operation of the self-hosted organization when the license renews. You have 60 days, from the date of renewal, to update the license file to you self-hosted server before your self-hosted organization is disabled.
There are two methods for updating a self-hosted organization's license, however Families organizations may only update manually:
Automatisk faktureringssynkronisering låser upp familjers sponsring (endast för företag) och förenklad licensuppdatering, vilket hindrar administratörer från att manuellt behöva ladda upp licenser på nytt, till exempel vid organisationsförnyelse. Så här ställer du in automatisk synkronisering:
note
To successfully setup Automatic Billing Sync, an active subscription license is required. If a self-hosted organization has been setup from a cloud hosted organization still in its trial period, a license will have to be downloaded and applied to the self-hosted organization once the trial period is over. Learn more about paid subscriptions here.
Steg 1: Aktivera molnkommunikation
Först måste du konfigurera din server för att tillåta kommunikation med våra molnsystem.
note
Det här steget måste slutföras av någon med åtkomst till din egen värdbaserade instanss konfigurationsfiler.
För att aktivera molnkommunikation, ställ in följande rad i bwdata/env/global.override.env till true:
BashglobalSettings__enableCloudCommunication=true globalSettings__baseServiceUri__cloudRegion=US
När du har ställt in detta värde, tillämpa ändringen genom att köra kommandot ./bitwarden.sh rebuild. Starta din server igen med startkommandot ./bitwarden.sh.
note
Att aktivera automatisk synkronisering kräver kommunikation med Bitwardens molnsystem. Om din miljö använder en brandvägg för att blockera utgående trafik måste du tillåta https://api.bitwarden.com eller .eu och https://identity.bitwarden.com eller .eu.
Steg 2: Hämta faktureringssynkroniseringstoken
När molnkommunikation har aktiverats på servernivå måste en synkroniseringstoken skickas från molnorganisationen du använder för fakturering till din egen värdorganisation. Så här hämtar du din synkroniseringstoken från molnwebbappen:
Logga in på Bitwarden-webbappen och öppna administratörskonsolen med hjälp av produktväxlaren:
Product switcher Navigera till Fakturering → Prenumeration.
Rulla ned till avsnittet för självvärd och välj knappen Ställ in faktureringssynkronisering.
Ange ditt huvudlösenord och välj Generera token.
Kopiera den genererade token.
Steg 3: Använd faktureringssynkroniseringstoken
Så här tillämpar du faktureringssynkroniseringstoken på din egen värdorganisation:
Öppna administratörskonsolen med egen värd och navigera till Fakturering → Prenumeration.
I avsnittet Licens- och faktureringshantering väljer du alternativet Automatisk synkronisering.
Välj knappen Hantera faktureringssynkronisering.
Klistra in din genererade Billing Sync Token och välj Spara.
note
Sync for Families for Enterprise kommer att ske en gång dagligen när du har utlöst din första synkronisering. Fältet Senaste synkronisering i det här avsnittet kommer att rapportera Aldrig förrän du utlöser din första synkronisering.
Synkronisering för licensuppdateringar måste alltid göras manuellt genom att välja knappen Synkronisera licens (se nästa avsnitt för detaljer).
Steg 4: Utlösa synkronisering
Utlösa en synkronisering när du har slutfört installationen och varje gång du behöver uppdatera din licens. Sync for Familes for Enterprise kommer att ske en gång dagligen. Så här utlöser du en synkronisering:
Öppna administratörskonsolen med egen värd och navigera till Organisation → Fakturering.
Välj knappen Synkronisera licens.
note
Om du får ett felmeddelande om version som inte stöds, uppdatera din server och försök ladda upp din licensfil igen. För att uppdatera din server, gör en säkerhetskopia av bwdata-katalogen och följ dessa instruktioner.