- Blog
- How to create a subset of credentials on your device
What do you do if your vault is jam packed with entries and you find it's become a bit too much for your everyday needs? Or maybe you have a desire to create a subset of credentials for your account when traveling, for example, so you have access to two completely different vaults.
Favorites
To do this, you have a few options. The simplest would be to add your most used items as Favorites, so they are more easily accessed.
The 2-person Organization method
The second option would be to create a free 2-person Organization, which will contain a separate vault to house those items you want isolated from your personal vault. With your new Organization created, you can add some vault items there, which your secondary account will not have access to. For example, you could create a Collection, called "Subset" and add other vault items to that. One thing to keep in mind is that Collections can only be created in the web vault. To create a new Collection follow these steps:
Open your Bitwarden web vault in your default web browser.
Click Organizations in the top toolbar.
Click the Manage tab.
Click New Collection (Figure 1).
Give the new Collection a name and an external ID.
Click Save.

Figure 1: Creating a new Collection for a Bitwarden Organization
With the new collection created, you can then add items to it from the web vault, the desktop app, or the mobile app.
The second account method
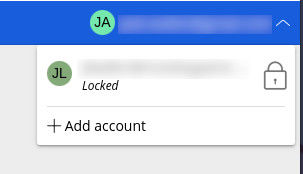
Another option would be to create a second account - in this case, you will need a second email address. This can be done from the desktop app by clicking your email address in the top right corner of the window and selecting Add account from the drop-down (Figure 2).

Figure 2: Adding a second account to your free 2-person Bitwarden account
Once the account is created, you can then invite the new account to the free 2-person Organization you created. You can also assign the secondary account access to items within an Organization or Collection. To do that you must invite the new user to the Organization and give them the access they need. Here are the steps for this:
Log into your Bitwarden web vault.
Click Organizations.
Click the Members tab.
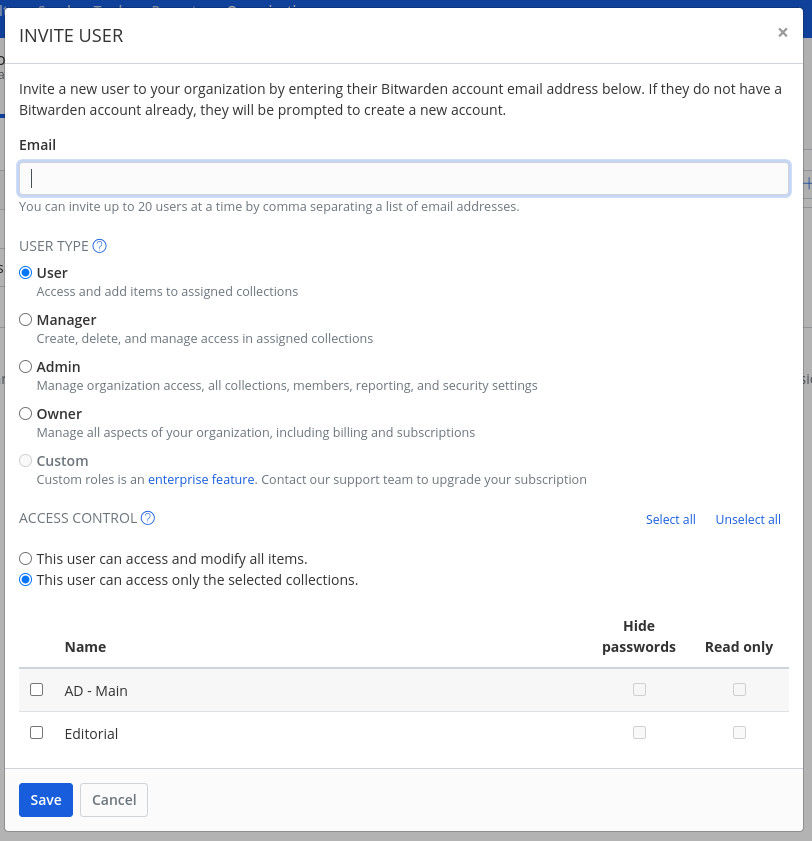
Click Invite User.
In the resulting popup (Figure 3), add the user's email address, select their user type, configure their access control, and then select a Collection for them to access.

Figure 3: Inviting a user to a Bitwarden Organization and giving them specific access to a Collection
The second user (which is actually you, in this case) will receive their invitation and must verify it via a link within the email. Once they've verified the invite, they'll have access to the Collections you selected.
Congratulations, you've just added a second account to Bitwarden. The vault associated with that account will be empty and ready for you to start adding all of the entries you need. When you're done with that account, click the Account drop-down in the upper right corner and select the other account associated with Bitwarden to switch.
Get started with Bitwarden
Interested in trying out Bitwarden? Sign up for a free business trial or register for a free individual account.
Jack Wallen is an award-winning author and avid supporter of open source technologies. He has covered open source, Linux, security, and more for publications including TechRepublic, CNET, ZDNet, The New Stack, Tech Target and many others since the 1990s in addition to writing over 50 novels.
